
| 일 | 월 | 화 | 수 | 목 | 금 | 토 |
|---|---|---|---|---|---|---|
| 1 | 2 | 3 | ||||
| 4 | 5 | 6 | 7 | 8 | 9 | 10 |
| 11 | 12 | 13 | 14 | 15 | 16 | 17 |
| 18 | 19 | 20 | 21 | 22 | 23 | 24 |
| 25 | 26 | 27 | 28 | 29 | 30 | 31 |
- 2023년
- 프로그래머스
- 백준
- 유니티
- 게임 엔진 공부
- todolist
- 개인 프로젝트
- 5월
- 2025년
- 개인 프로젝트 - 런앤건
- c++
- 입문
- 2월
- 다이나믹 프로그래밍
- 코딩 기초 트레이닝
- 유니티 심화과정
- 코딩 테스트
- 1월
- 3월
- 7월
- 기초
- 10월
- 수학
- 2022년
- 4월
- 자료 구조
- 2024년
- 골드메탈
- 단계별로 풀어보기
- C/C++
- Today
- Total
기록 보관소
[Unity/유니티] 기초-탑다운 2D RPG: 모바일 UI & 안드로이드 빌드[BE3] 본문
개요
유니티 입문과 독학을 위해서 아래 링크의 골드메탈님의 영상들을 보며 진행 상황 사진 또는 캡처를 올리고 배웠던 점을 요약해서 적는다.
현재는 영상들을 보고 따라하고 배우는 것에 집중할 것이며, 영상을 모두 보고 따라한 후에는 개인 프로젝트를 설계하고 직접 만드는 것이 목표다.
https://youtube.com/playlist?list=PLO-mt5Iu5TeYI4dbYwWP8JqZMC9iuUIW2
유니티 강좌 기초 채널 Basic
유니티 개발을 처음 시작하시는 입문자 분들을 위한 기초 채널. [ 프로젝트 ] B00 ~ B12 (BE1) : 유니티 필수 기초 B13 ~ B19 (BE2) : 2D 플랫포머 B20 ~ B26 (BE3) : 2D 탑다운 대화형 RPG B27 ~ B37 (BE4) : 2D 종스크롤
www.youtube.com
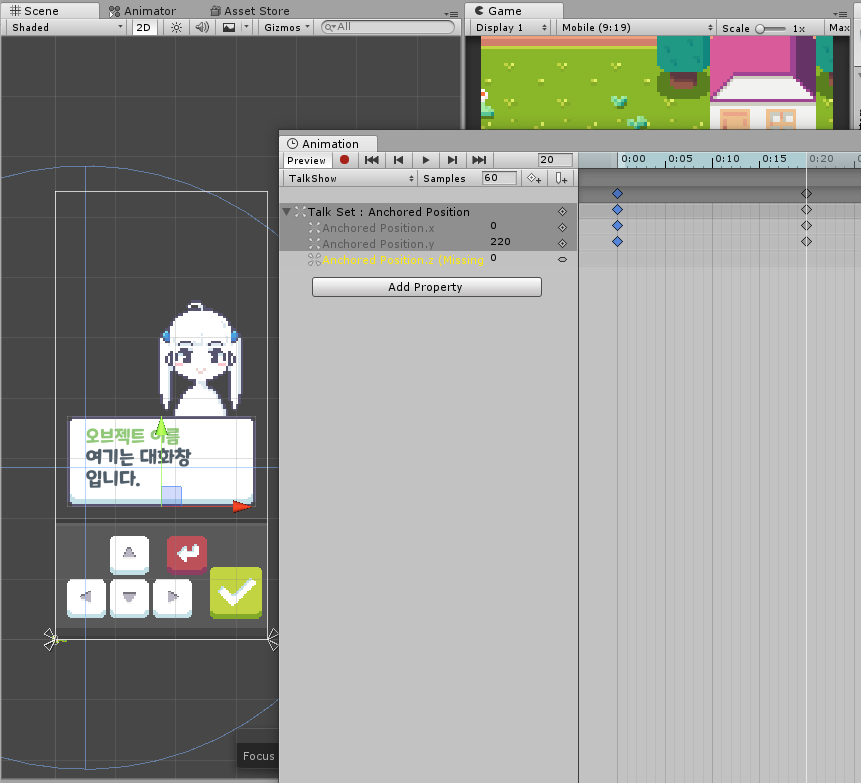
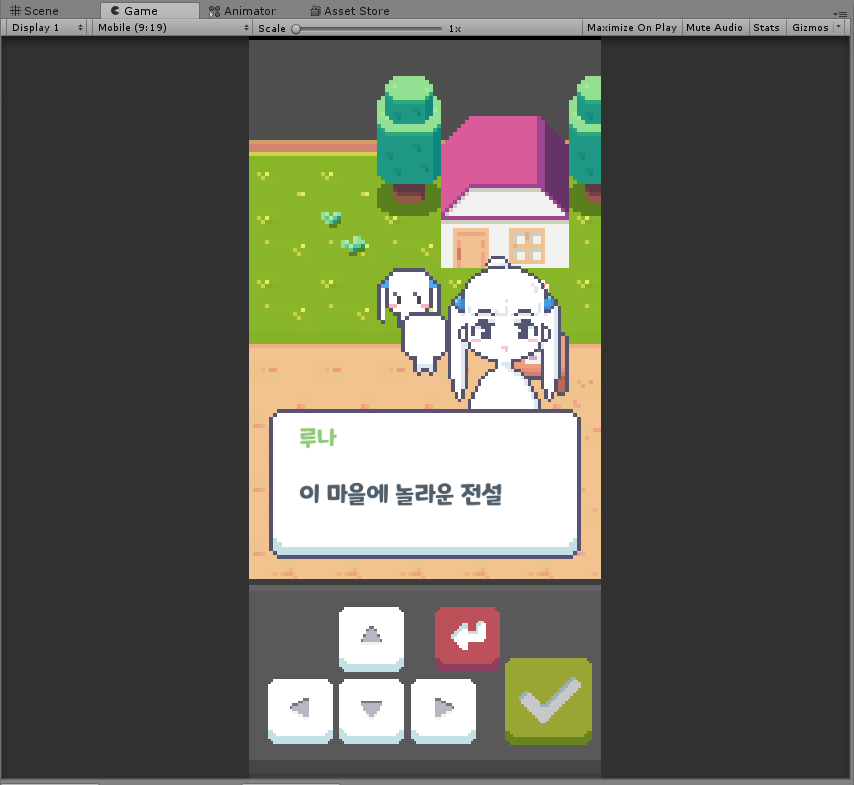
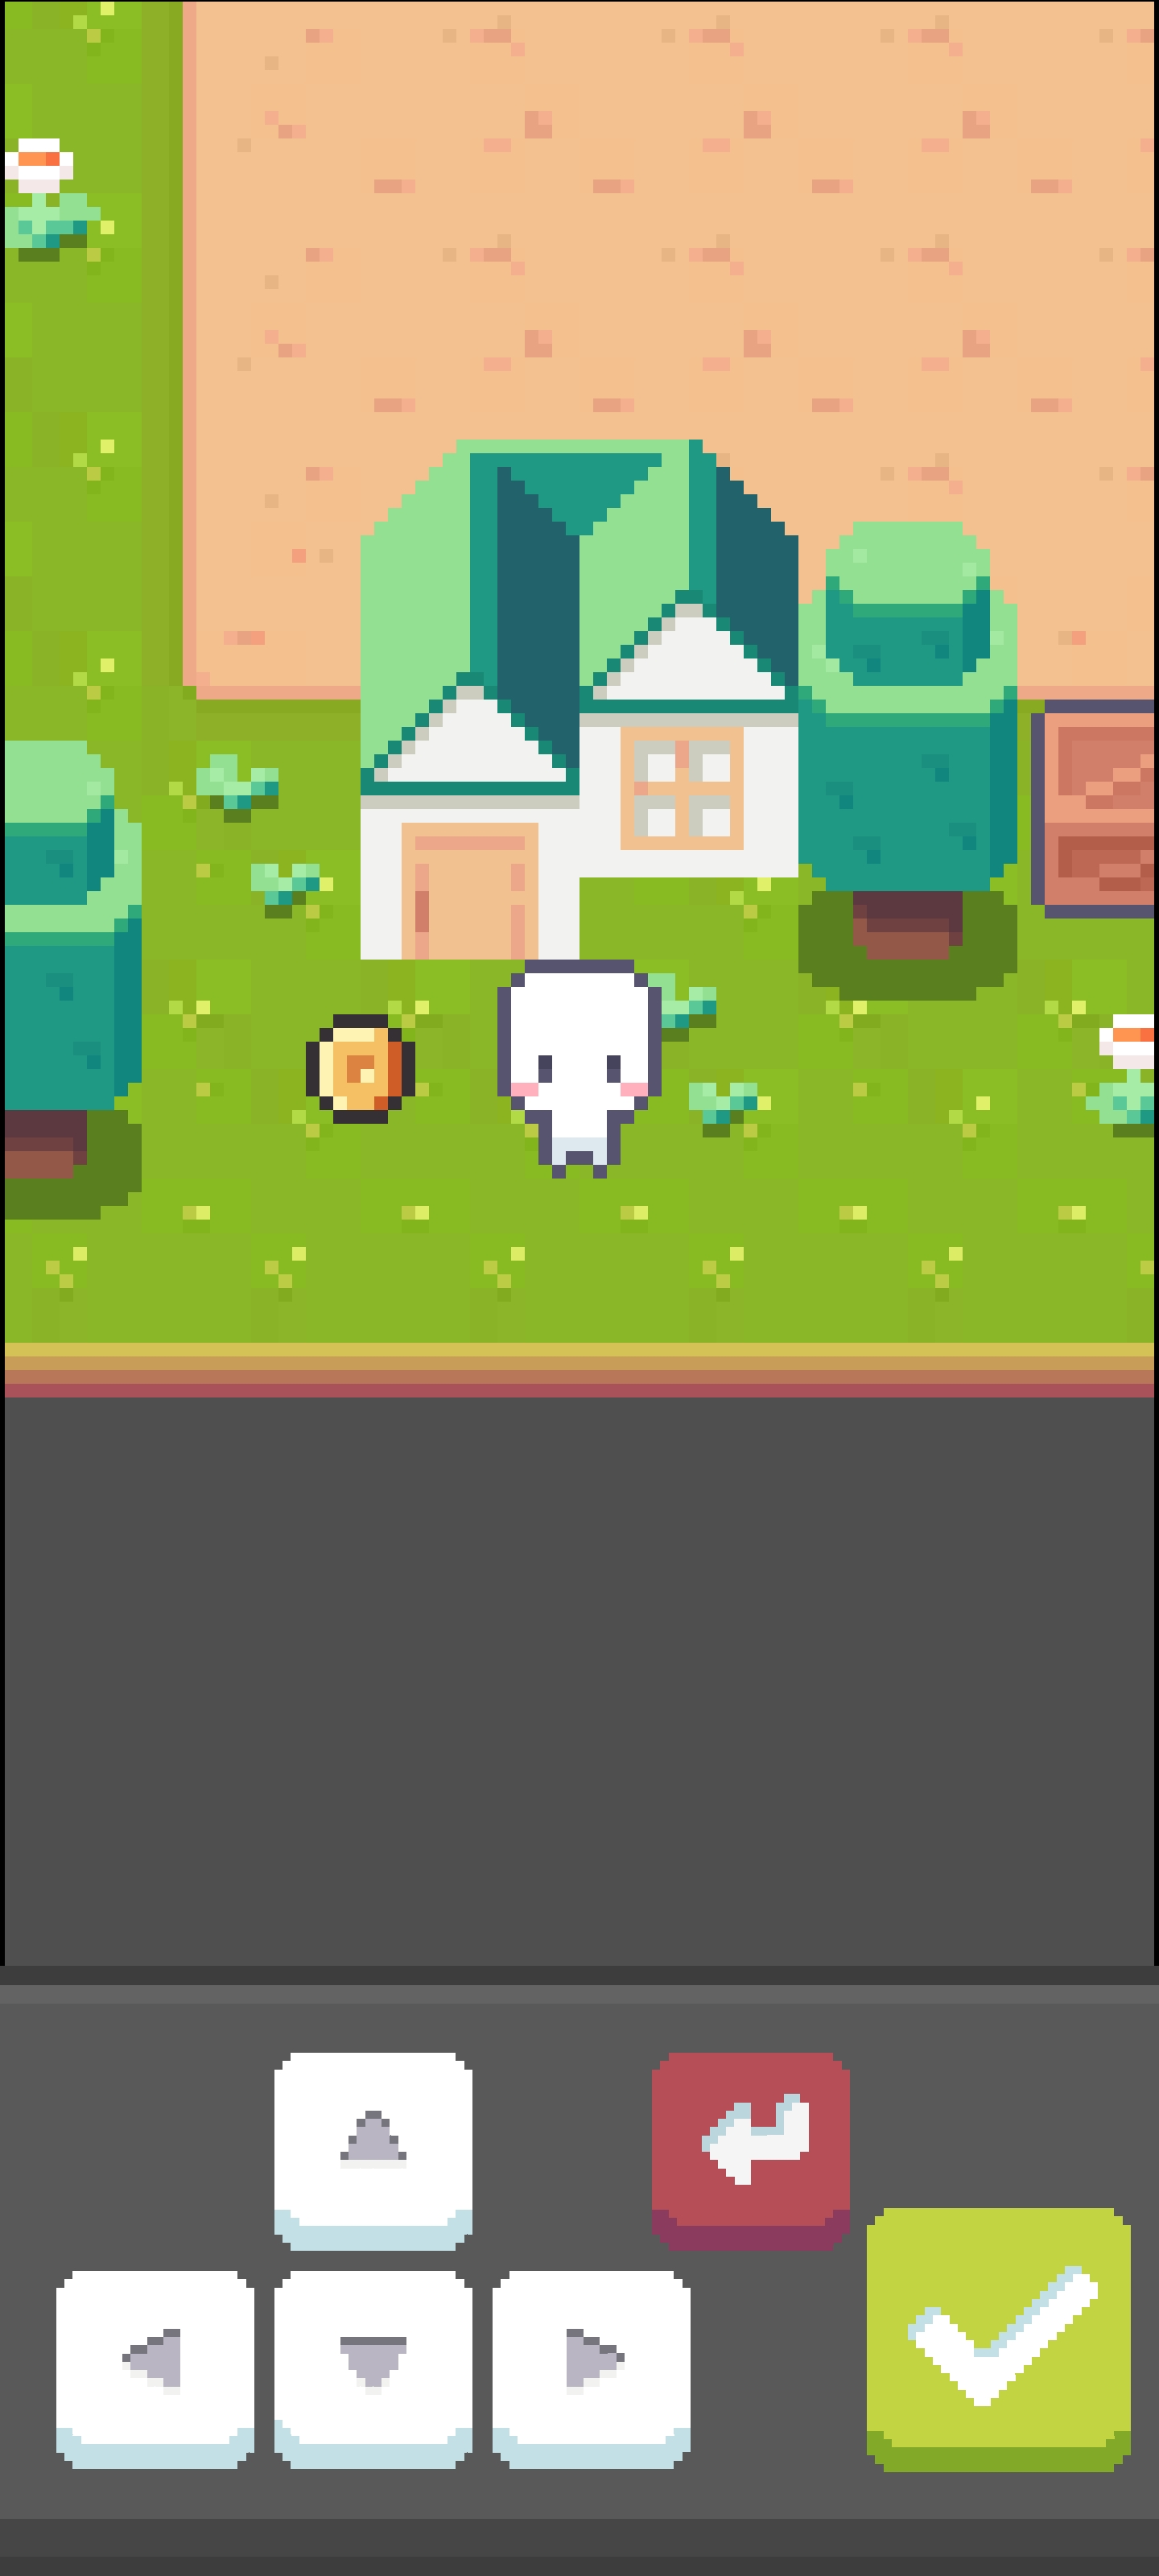
탑다운 2D RPG: 모바일 UI & 안드로이드 빌드[BE3]
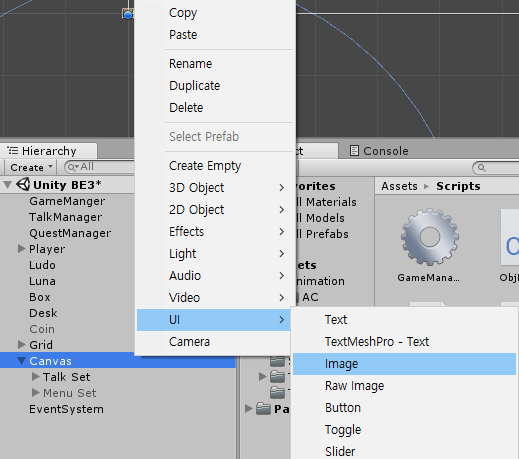
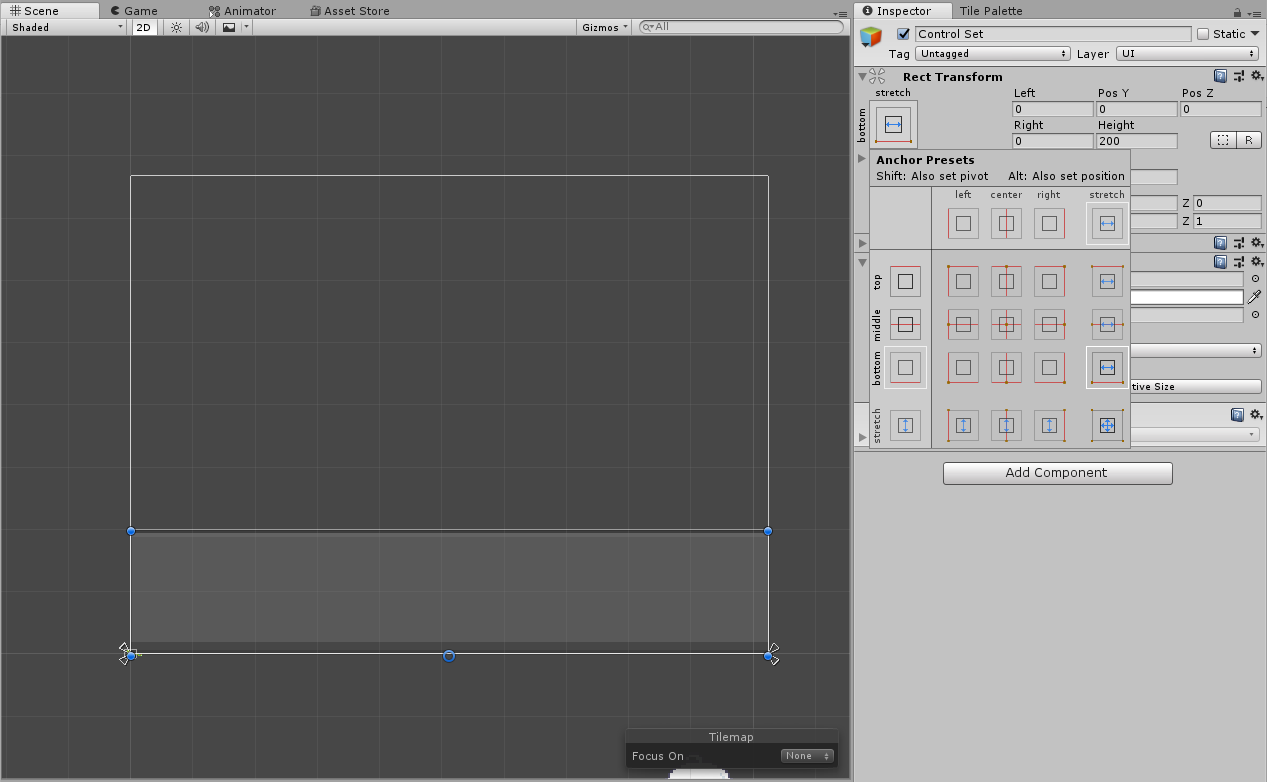
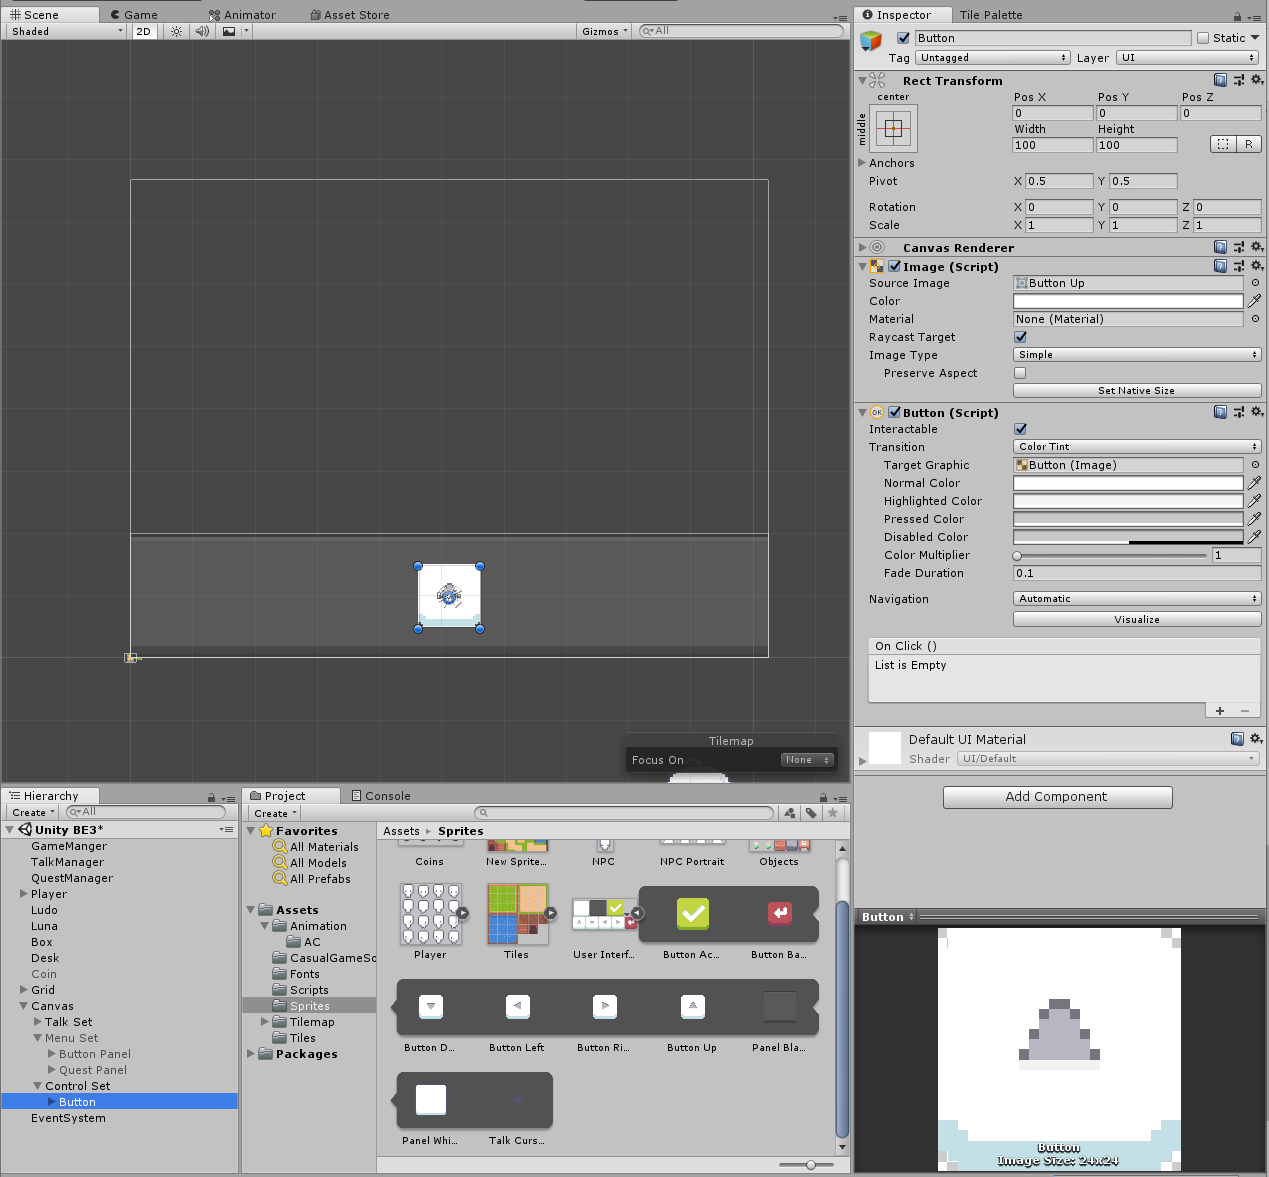
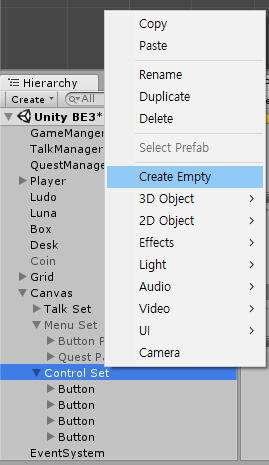
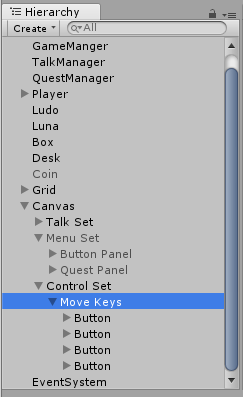
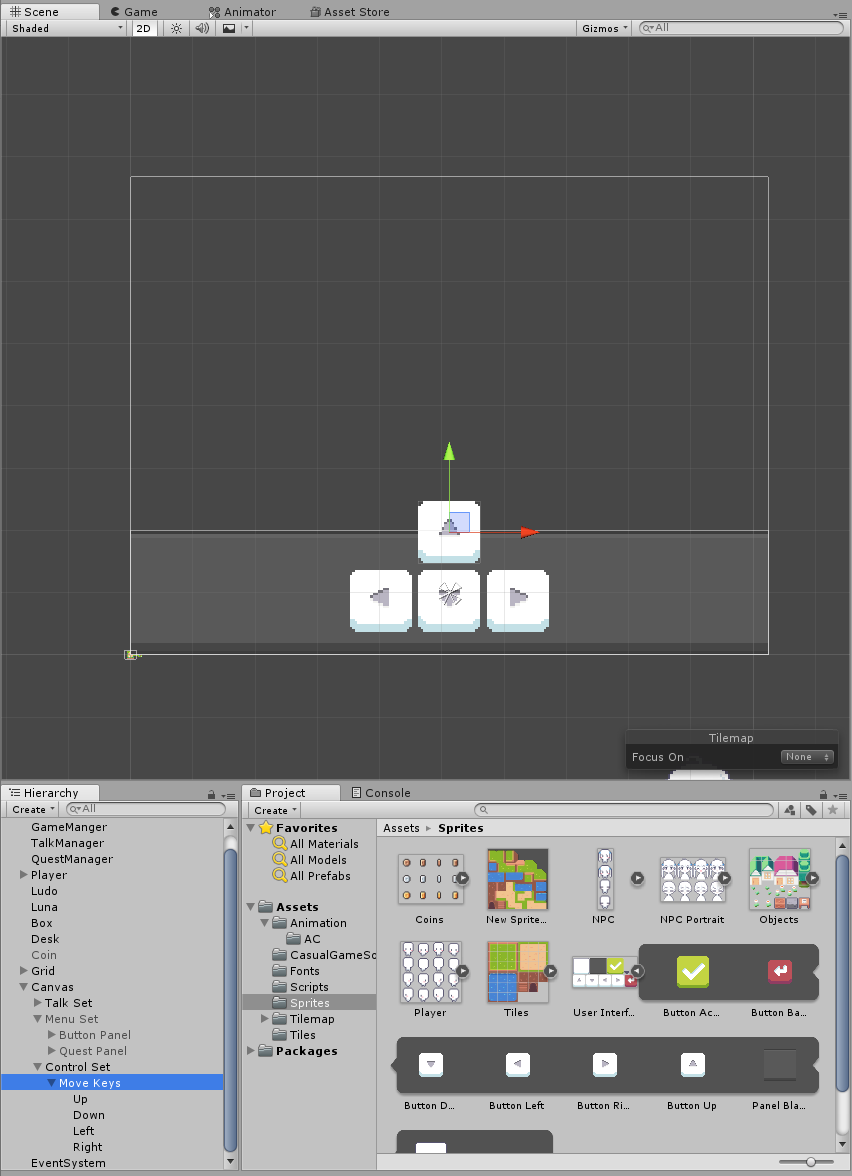
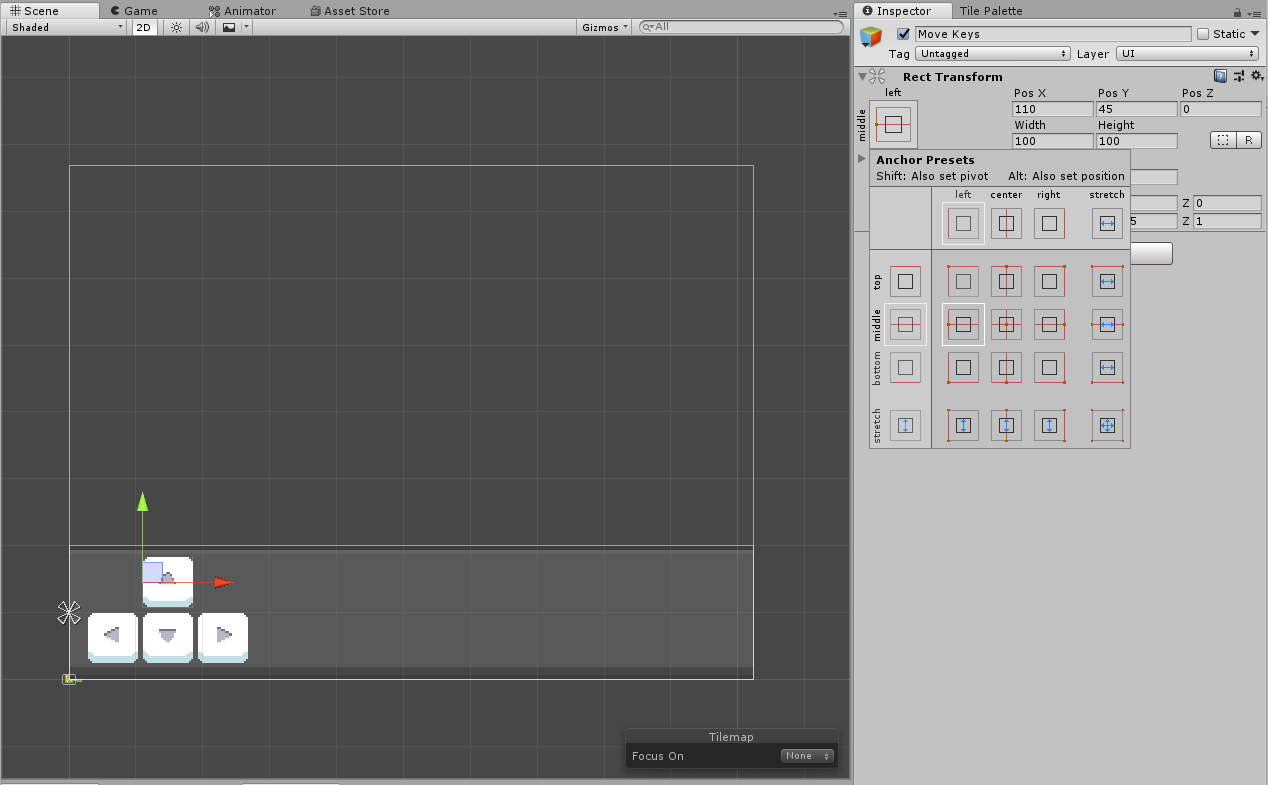
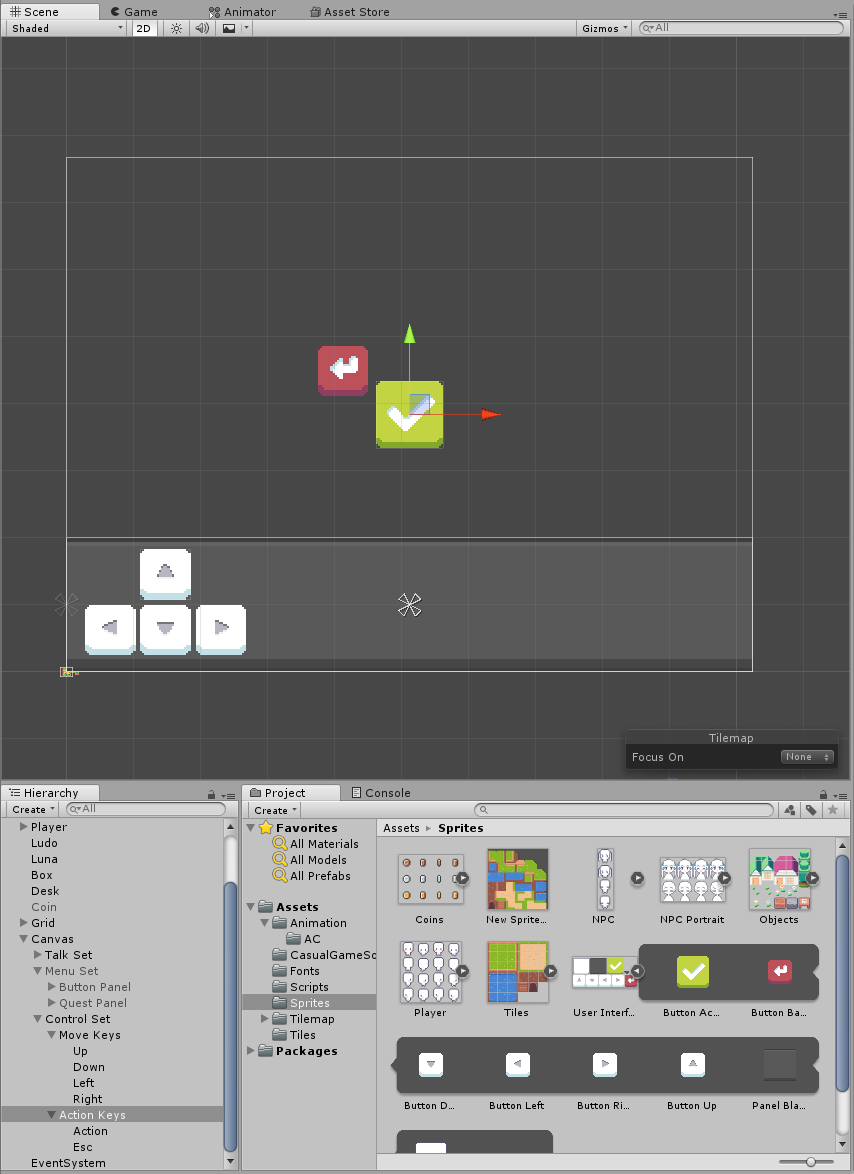
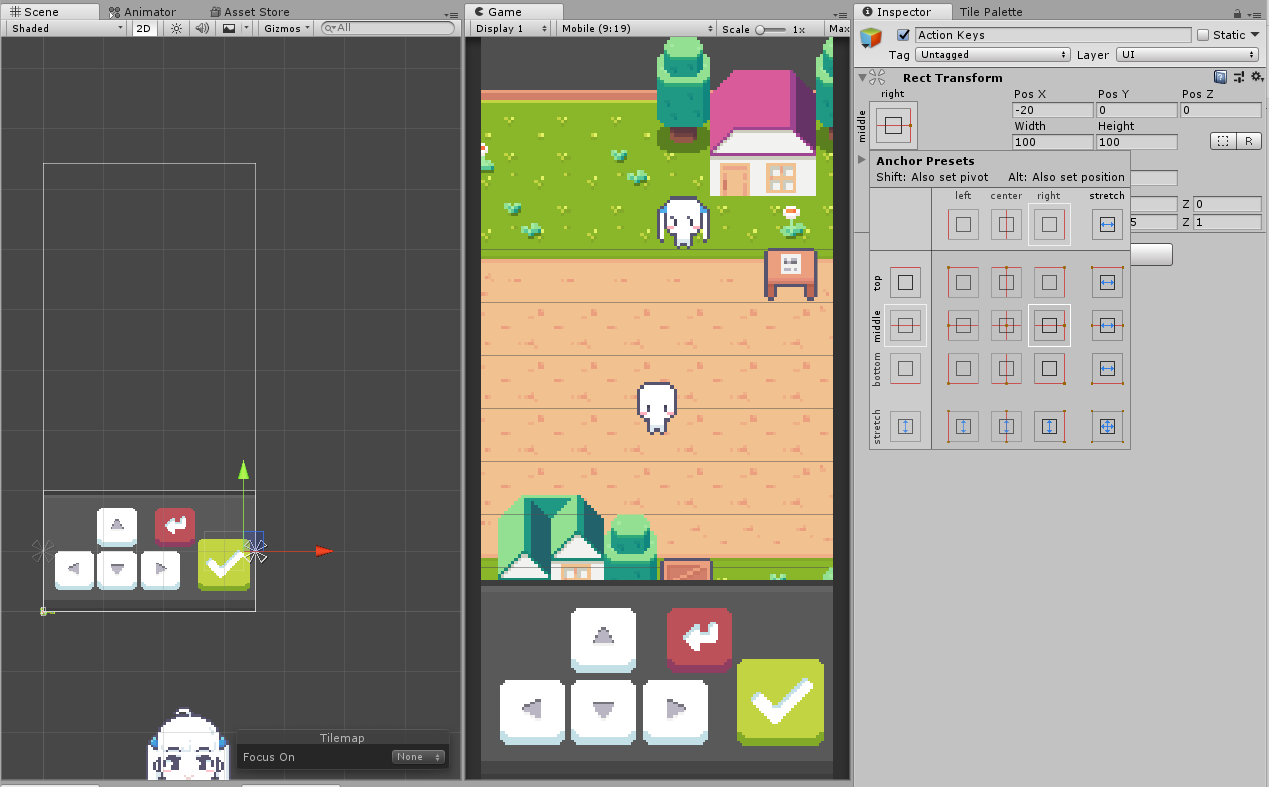
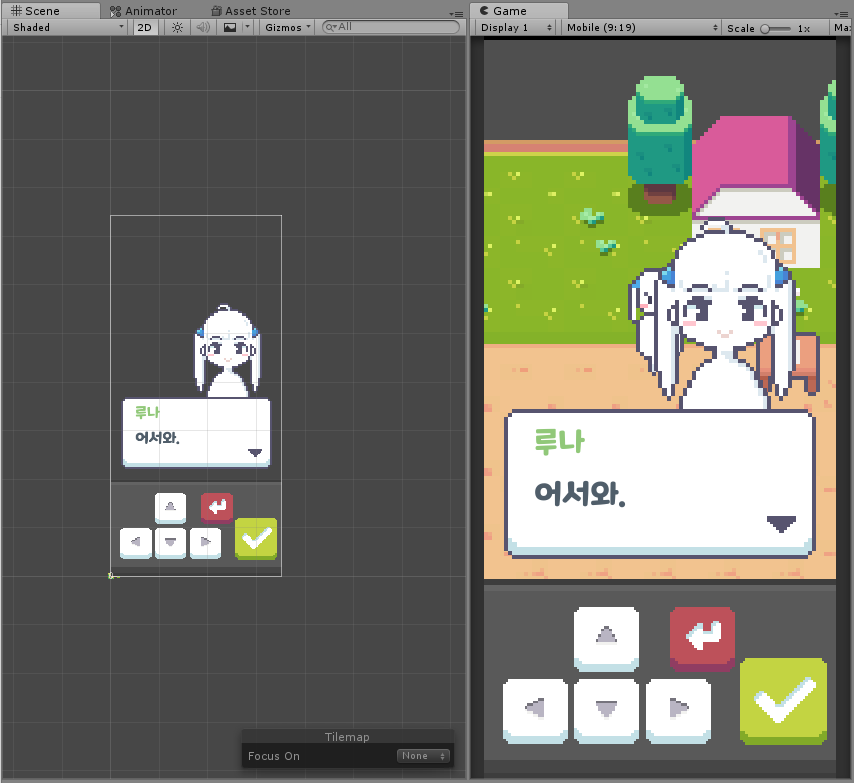
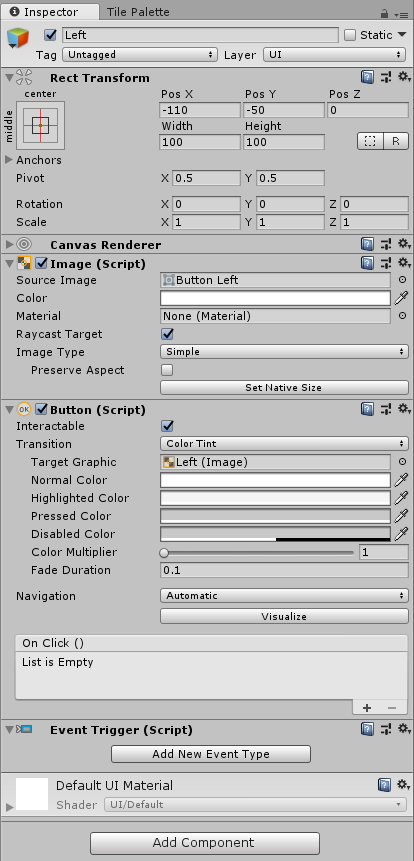
1. 컨트롤 UI 구축하기

2. 터치 방향키 로직
//PlayerAction 스크립트 파일

using System.Collections;
using System.Collections.Generic;
using UnityEngine;

public class PlayerAction : MonoBehaviour {
    public float Speed;
    public GameManager manager;

    Rigidbody2D rigid;
    Animator anim;
    Vector3 dirVec;
    GameObject scanObject;
    float h;
    float v;
    bool isHorizonMove;

    //모바일 버튼 변수
    int up_Value;
    int down_Value;
    int left_Value;
    int right_Value;
    bool up_Down;
    bool down_Down;
    bool left_Down;
    bool right_Down;
    bool up_Up;
    bool down_Up;
    bool left_Up;
    bool right_Up;

    void Awake () {
        rigid = GetComponent<Rigidbody2D>();
        anim = GetComponent<Animator>();
	}

	void Update () {
        //이동 값 설정
        h = manager.isAction ? 0 : Input.GetAxisRaw("Horizontal") + right_Value + left_Value;
        v = manager.isAction ? 0 : Input.GetAxisRaw("Vertical") + up_Value + down_Value;

        //이동 버튼 확인
        bool hDown = manager.isAction ? false : Input.GetButtonDown("Horizontal") || right_Down || left_Down;
        bool vDown = manager.isAction ? false : Input.GetButtonDown("Vertical") || up_Down || down_Down;
        bool hUp = manager.isAction ? false : Input.GetButtonUp("Horizontal") || right_Up || left_Up;
        bool vUp = manager.isAction ? false : Input.GetButtonUp("Vertical") || up_Up || down_Up;

        //이동 방향 체크
        if (hDown || vUp)   //수평
            isHorizonMove = true;
        else if (vDown || hUp)  //수직
            isHorizonMove = false;
        else if (hUp || vUp)
            isHorizonMove = h != 0;

        //애니메이션 전환
        if (anim.GetInteger("hAxisRaw") != h) {
            anim.SetBool("isChange", true);
            anim.SetInteger("hAxisRaw", (int)h);

        }
        else if (anim.GetInteger("vAxisRaw") != v) {
            anim.SetBool("isChange", true);
            anim.SetInteger("vAxisRaw", (int)v);
        }
        else
            anim.SetBool("isChange", false);

        //레이 방향 판단하기
        if (vDown && v == 1)    //위쪽 방향
            dirVec = Vector3.up;
        else if (vDown && v == -1)    //아래쪽 방향
            dirVec = Vector3.down;
        else if (hDown && h == -1)    //왼쪽 방향
            dirVec = Vector3.left;
        else if (hDown && h == 1)    //오른쪽 방향
            dirVec = Vector3.right;

        //오브젝트 스캔 출력
        if (Input.GetButtonDown("Jump") && scanObject != null) {
            manager.Action(scanObject);
        }

        //모바일 버튼 초기화
        up_Down = false;
        down_Down = false;
        left_Down = false;
        right_Down = false;
        up_Up = false;
        down_Up = false;
        left_Up = false;
        right_Up = false;
    }

    void FixedUpdate() {
        //수평, 수직 이동 결정
        Vector2 moveVec = isHorizonMove ? new Vector2(h, 0) : new Vector2(0, v);
        rigid.velocity = moveVec * Speed;

        //레이 사용하기
        Debug.DrawRay(rigid.position, dirVec * 0.7f, new Color(0,1,0));
        RaycastHit2D rayHit = Physics2D.Raycast(rigid.position, dirVec, 0.7f, LayerMask.GetMask("Object"));

        if (rayHit.collider != null) {
            scanObject = rayHit.collider.gameObject;    //RayCast된 오브젝트를 변수로 저장
        }
        else
            scanObject = null;
    }

    public void ButtonDown(string type) {
        switch(type) {
            case "U":
                up_Value = 1;
                up_Down = true;
                break;
            case "D":
                down_Value = -1;
                down_Down = true;
                break;
            case "L":
                left_Value = -1;
                left_Down = true;
                break;
            case "R":
                right_Value = 1;
                right_Down = true;
                break;
        }
    }

    public void ButtonUp(string type) {
        switch (type) {
            case "U":
                up_Value = 0;
                up_Up = true;
                break;
            case "D":
                down_Value = 0;
                down_Up = true;
                break;
            case "L":
                left_Value = 0;
                left_Up = true;
                break;
            case "R":
                right_Value = 0;
                right_Up = true;
                break;
        }
    }
}
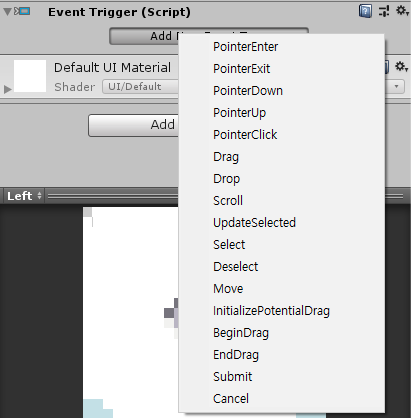
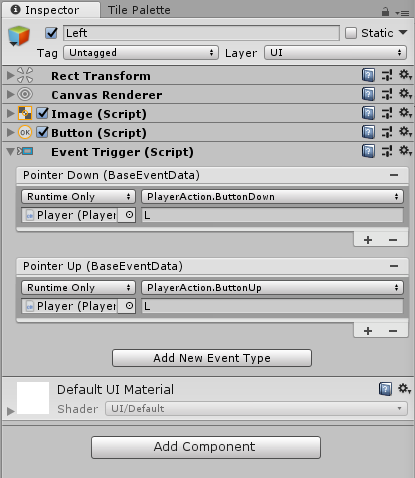
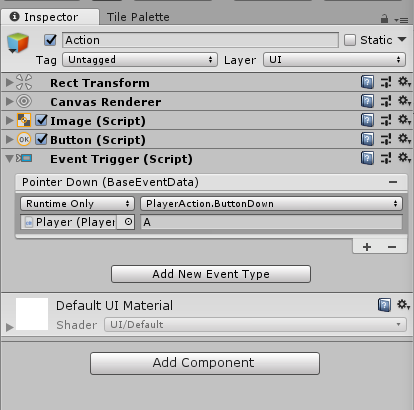
- Event Trigger : UI 이벤트를 관리하는 컴포넌트.
- 이번 버튼 설정에서 On Click()이 아닌 Event Trigger 컴포넌트를 사용한 이유는 단순 클릭만이 아닌, 키보드의 화살표 키처럼 이동 버튼을 계속 누르고 있을 때와 땠을 때를 모두 처리하기위함이다.
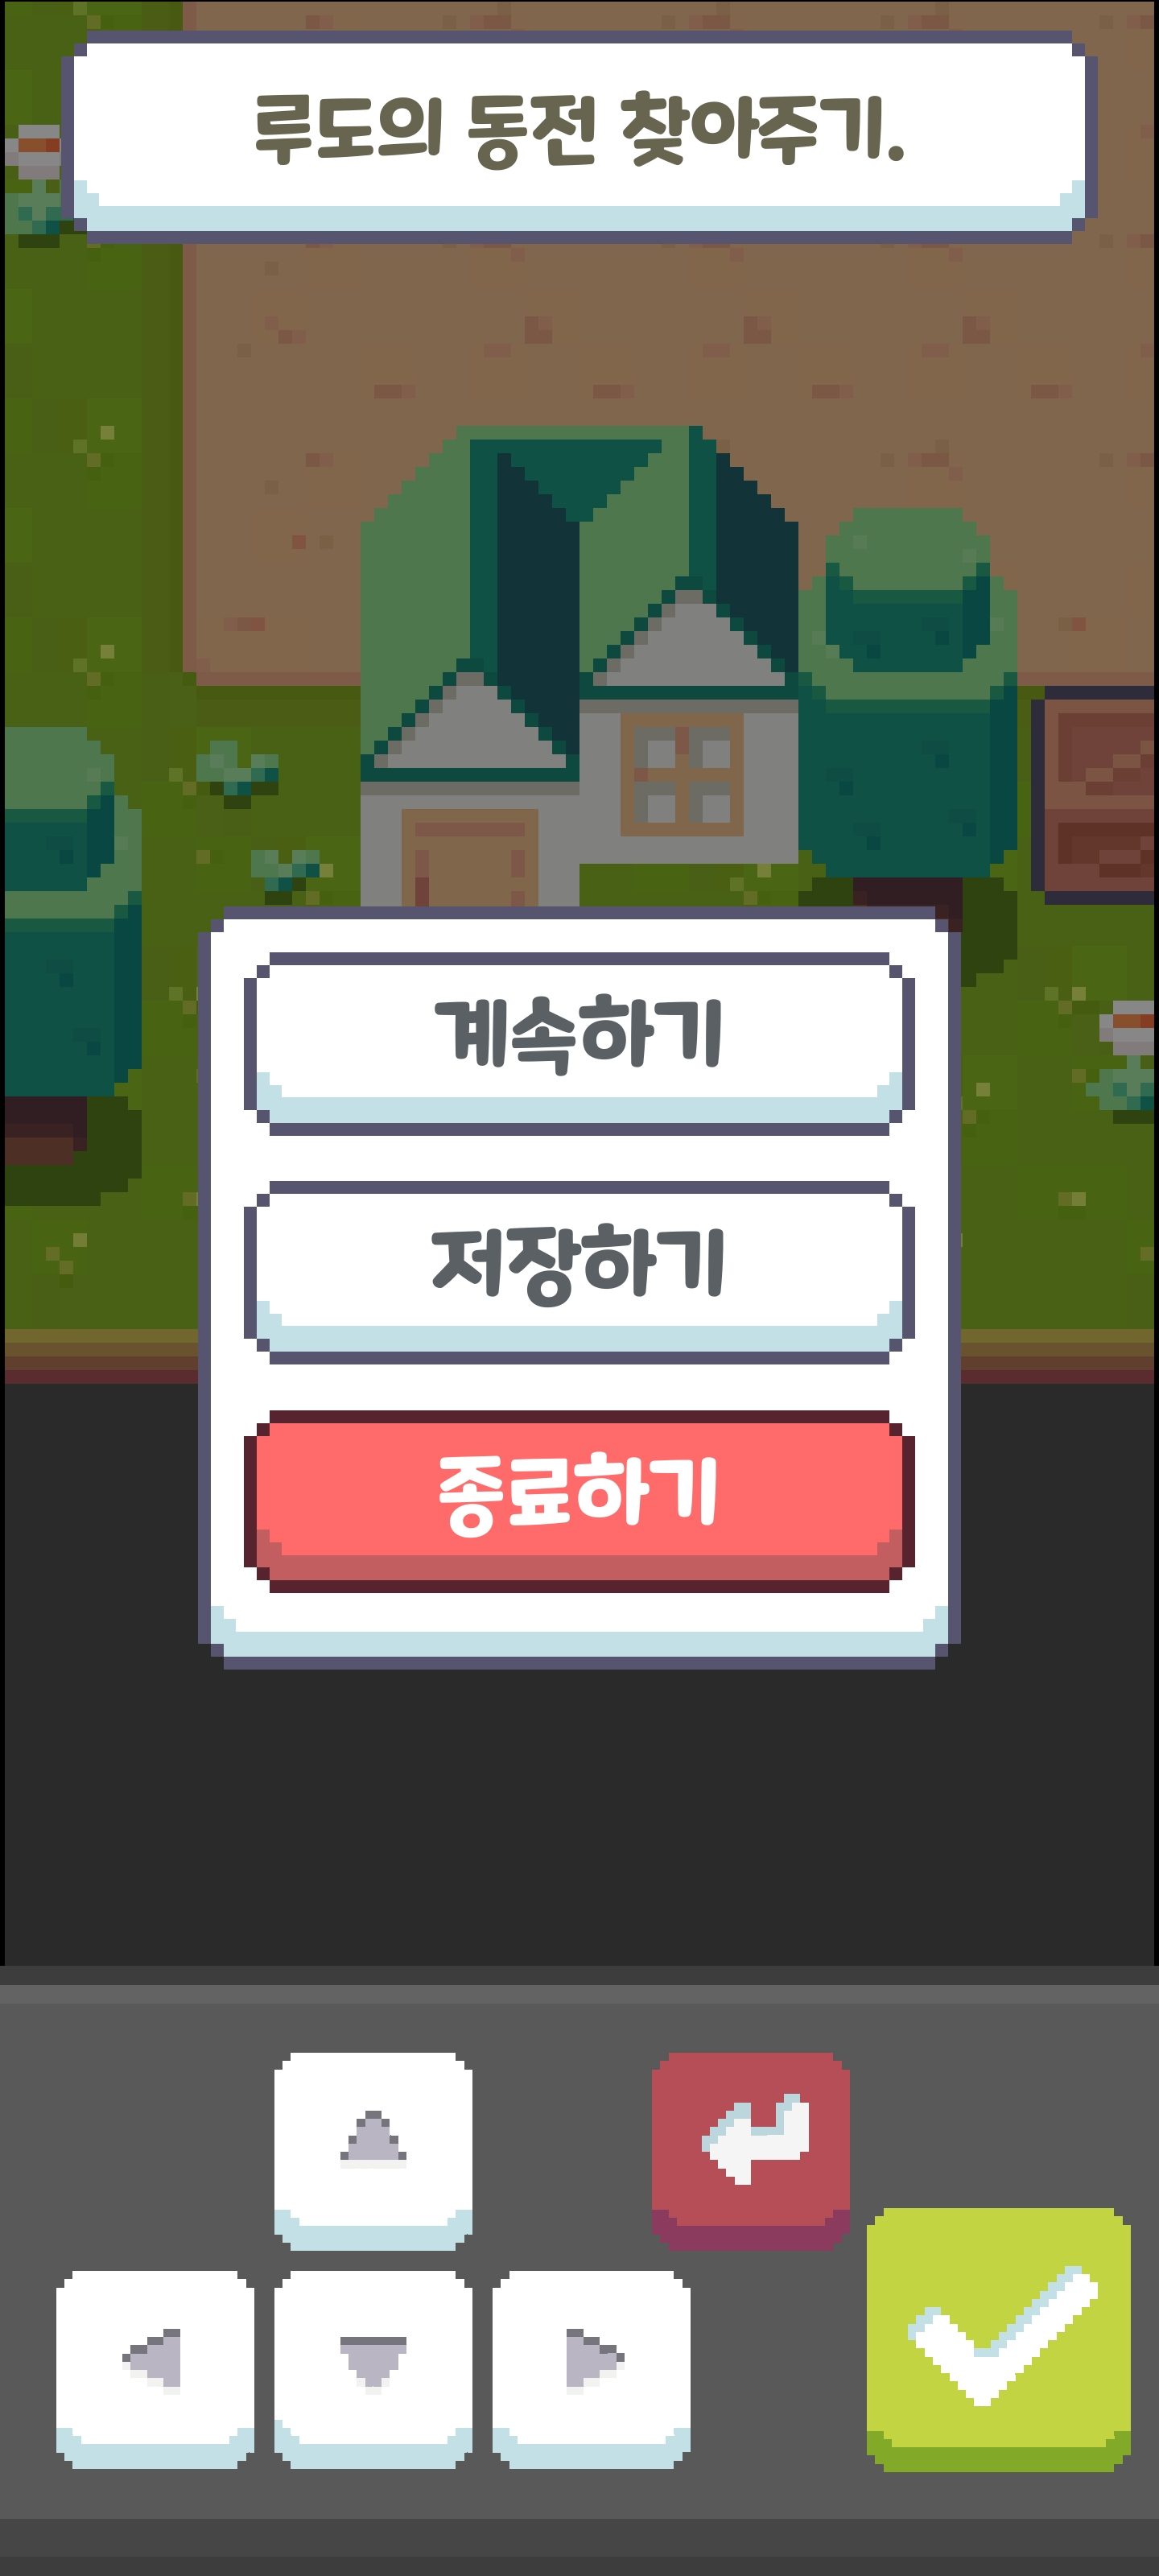
3. 터치 액션키 로직
//PlayerAction 스크립트 파일
using System.Collections;
using System.Collections.Generic;
using UnityEngine;
public class PlayerAction : MonoBehaviour {
public float Speed;
public GameManager manager;
Rigidbody2D rigid;
Animator anim;
Vector3 dirVec;
GameObject scanObject;
float h;
float v;
bool isHorizonMove;
//모바일 버튼 변수
int up_Value;
int down_Value;
int left_Value;
int right_Value;
bool up_Down;
bool down_Down;
bool left_Down;
bool right_Down;
bool up_Up;
bool down_Up;
bool left_Up;
bool right_Up;
void Awake () {
rigid = GetComponent<Rigidbody2D>();
anim = GetComponent<Animator>();
}
void Update () {
//이동 값 설정
h = manager.isAction ? 0 : Input.GetAxisRaw("Horizontal") + right_Value + left_Value;
v = manager.isAction ? 0 : Input.GetAxisRaw("Vertical") + up_Value + down_Value;
//이동 버튼 확인
bool hDown = manager.isAction ? false : Input.GetButtonDown("Horizontal") || right_Down || left_Down;
bool vDown = manager.isAction ? false : Input.GetButtonDown("Vertical") || up_Down || down_Down;
bool hUp = manager.isAction ? false : Input.GetButtonUp("Horizontal") || right_Up || left_Up;
bool vUp = manager.isAction ? false : Input.GetButtonUp("Vertical") || up_Up || down_Up;
//이동 방향 체크
if (hDown || vUp) //수평
isHorizonMove = true;
else if (vDown || hUp) //수직
isHorizonMove = false;
else if (hUp || vUp)
isHorizonMove = h != 0;
//애니메이션 전환
if (anim.GetInteger("hAxisRaw") != h) {
anim.SetBool("isChange", true);
anim.SetInteger("hAxisRaw", (int)h);
}
else if (anim.GetInteger("vAxisRaw") != v) {
anim.SetBool("isChange", true);
anim.SetInteger("vAxisRaw", (int)v);
}
else
anim.SetBool("isChange", false);
//레이 방향 판단하기
if (vDown && v == 1) //위쪽 방향
dirVec = Vector3.up;
else if (vDown && v == -1) //아래쪽 방향
dirVec = Vector3.down;
else if (hDown && h == -1) //왼쪽 방향
dirVec = Vector3.left;
else if (hDown && h == 1) //오른쪽 방향
dirVec = Vector3.right;
//오브젝트 스캔 출력
if (Input.GetButtonDown("Jump") && scanObject != null)
manager.Action(scanObject);
//모바일 버튼 초기화
up_Down = false;
down_Down = false;
left_Down = false;
right_Down = false;
up_Up = false;
down_Up = false;
left_Up = false;
right_Up = false;
}
void FixedUpdate() {
//수평, 수직 이동 결정
Vector2 moveVec = isHorizonMove ? new Vector2(h, 0) : new Vector2(0, v);
rigid.velocity = moveVec * Speed;
//레이 사용하기
Debug.DrawRay(rigid.position, dirVec * 0.7f, new Color(0,1,0));
RaycastHit2D rayHit = Physics2D.Raycast(rigid.position, dirVec, 0.7f, LayerMask.GetMask("Object"));
if (rayHit.collider != null) {
scanObject = rayHit.collider.gameObject; //RayCast된 오브젝트를 변수로 저장
}
else
scanObject = null;
}
public void ButtonDown(string type) {
switch(type) {
case "U":
up_Value = 1;
up_Down = true;
break;
case "D":
down_Value = -1;
down_Down = true;
break;
case "L":
left_Value = -1;
left_Down = true;
break;
case "R":
right_Value = 1;
right_Down = true;
break;
case "A":
if (scanObject != null)
manager.Action(scanObject);
break;
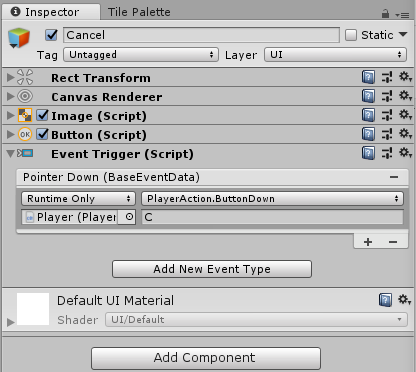
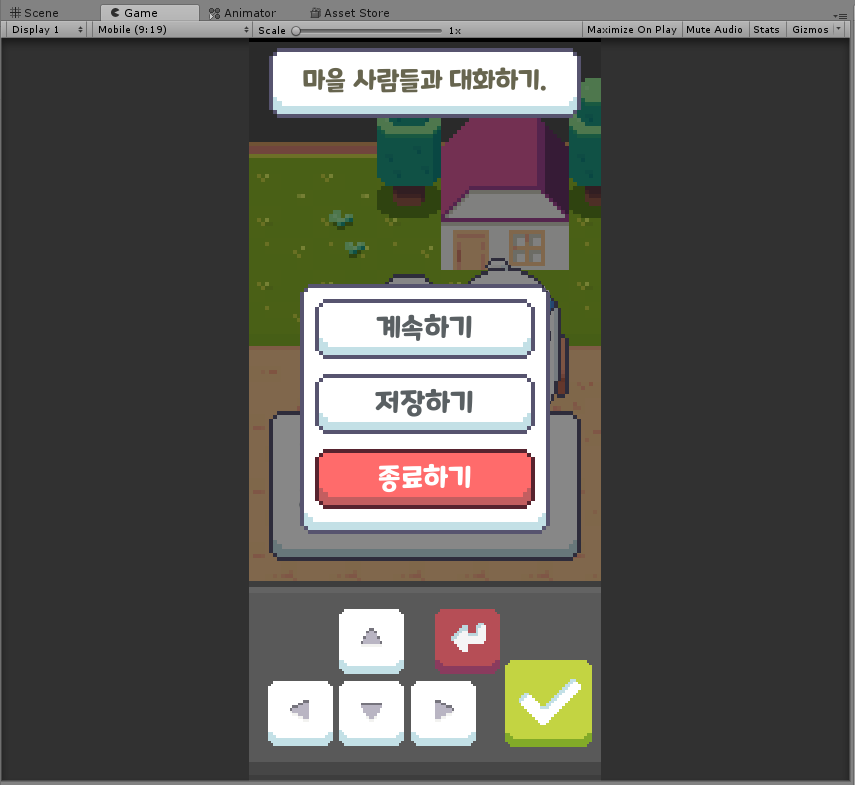
case "C":
manager.SubMenuActive();
break;
}
}
public void ButtonUp(string type) {
switch (type) {
case "U":
up_Value = 0;
up_Up = true;
break;
case "D":
down_Value = 0;
down_Up = true;
break;
case "L":
left_Value = 0;
left_Up = true;
break;
case "R":
right_Value = 0;
right_Up = true;
break;
}
}
}//GameManager 스크립트 파일
using System.Collections;
using System.Collections.Generic;
using UnityEngine;
using UnityEngine.UI;
public class GameManager : MonoBehaviour {
public TalkManager talkManager;
public QuestManager questManager;
public Animator talkPanel;
public Image portraitImg;
public Animator portraitAnim;
public Sprite prevPortrait;
public TypeEffect talk;
public Text questText;
public Text nameText;
public GameObject scanObject;
public GameObject menuSet;
public GameObject player;
public bool isAction; //대화창 활성화 여부 체크
public int talkIndex;
void Start() {
GameLoad();
questText.text = questManager.CheckQuest();
}
void Update() {
//서브 메뉴
if (Input.GetButtonDown("Cancel")) //Esc키
SubMenuActive();
}
public void SubMenuActive() {
if (menuSet.activeSelf) //활성화 되어있다면
menuSet.SetActive(false); //비활성화
else
menuSet.SetActive(true);
}
public void Action (GameObject scanObj) {
scanObject = scanObj;
ObjData objData = scanObject.GetComponent<ObjData>();
Talk(objData.id, objData.isNPC, objData.ObjectName);
//대화창 활성화, 비활성화
talkPanel.SetBool("isShow", isAction);
}
void Talk(int id, bool isNPC, string objectName) {
int questTalkIndex = 0;
string talkData = "";
nameText.text = objectName; //오브젝트 이름 출력
//대화 데이터 불러오기
if (talk.isAnim) { //대사 출력 중일때
talk.SetMsg("");
return;
}
else {
questTalkIndex = questManager.GetQuestTalkIndex(id);
talkData = talkManager.GetTalk(id + questTalkIndex, talkIndex);
}
//대화가 끝나면 멈추기
if (talkData == null) {
isAction = false;
talkIndex = 0;
questText.text = questManager.CheckQuest(id);
return;
}
//대화 전 체크하기
if (isNPC) { //NPC라면
talk.SetMsg(talkData.Split(':')[0]);
//초상화 보이기
portraitImg.sprite = talkManager.GetPortrait(id, int.Parse(talkData.Split(':')[1]));
portraitImg.color = new Color(1, 1, 1, 1);
//초상화 애니메이션
if (prevPortrait != portraitImg.sprite) {
portraitAnim.SetTrigger("doEffect");
prevPortrait = portraitImg.sprite;
}
}
else { //NPC가 아니라면
talk.SetMsg(talkData);
portraitImg.color = new Color(1, 1, 1, 0); //초상화 투명화
}
//대화창 띄우기 및 대화 인덱스 증가
isAction = true;
talkIndex++;
}
public void GameSave() {
//플레이어 위치, 퀘스트 진행도 데이터 세팅 및 저장
PlayerPrefs.SetFloat("PlayerX",player.transform.position.x);
PlayerPrefs.SetFloat("PlayerY", player.transform.position.y);
PlayerPrefs.SetInt("QuestID", questManager.questID);
PlayerPrefs.SetInt("QuestActionIndex", questManager.questActionIndex);
PlayerPrefs.Save();
//저장 후 메뉴 닫기
menuSet.SetActive(false);
}
public void GameLoad() {
if (!PlayerPrefs.HasKey("PlayerX")) //레지스트리가 없다면. 즉, 첫 시작이라면
return;
//레지스트리로부터 데이터 불러오기
float x = PlayerPrefs.GetFloat("PlayerX");
float y = PlayerPrefs.GetFloat("PlayerY");
int questID = PlayerPrefs.GetInt("QuestID");
int questActionIndex = PlayerPrefs.GetInt("QuestActionIndex");
//불러온 데이터 적용
player.transform.position = new Vector3(x, y, -2);
questManager.questID = questID;
questManager.questActionIndex = questActionIndex;
questManager.ControlObject();
}
public void GameExit() {
//게임 종료
Application.Quit();
}
}
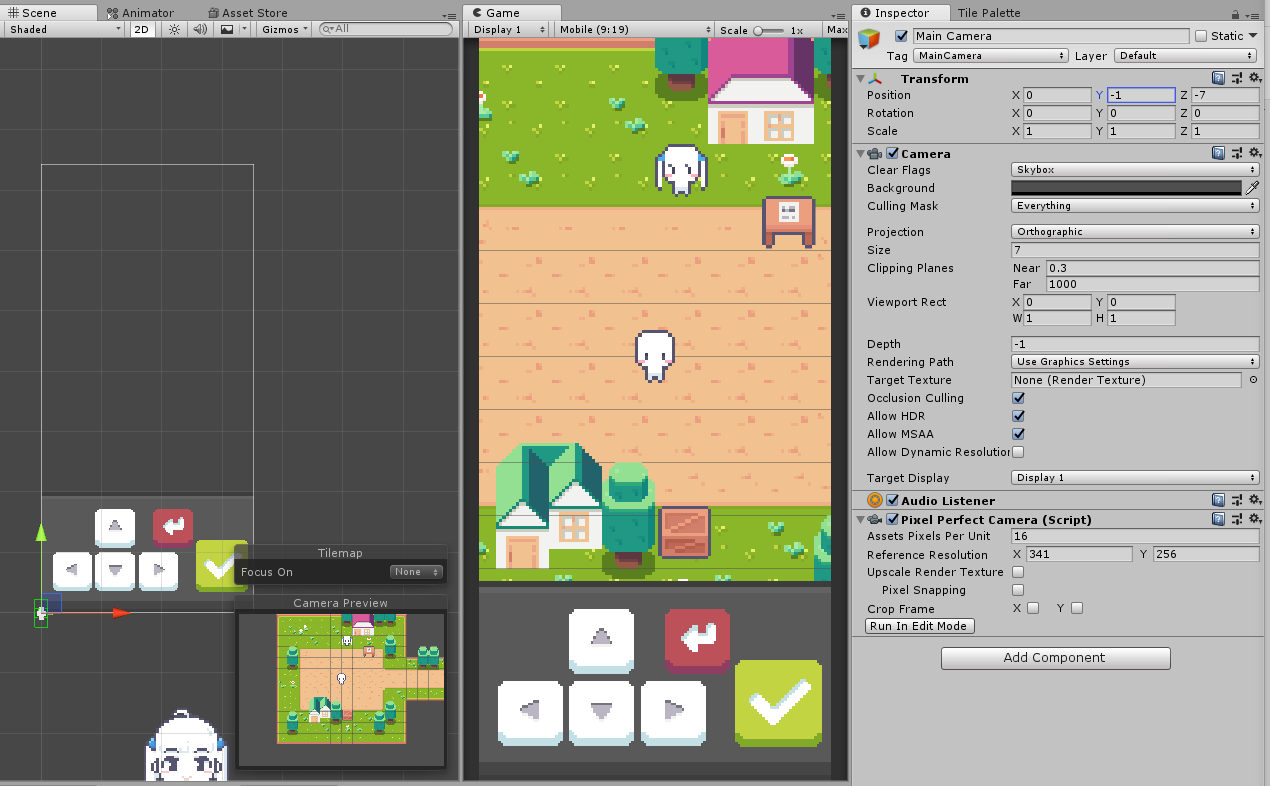
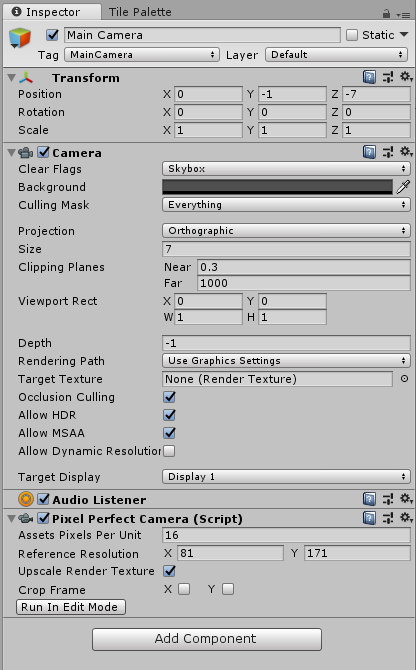
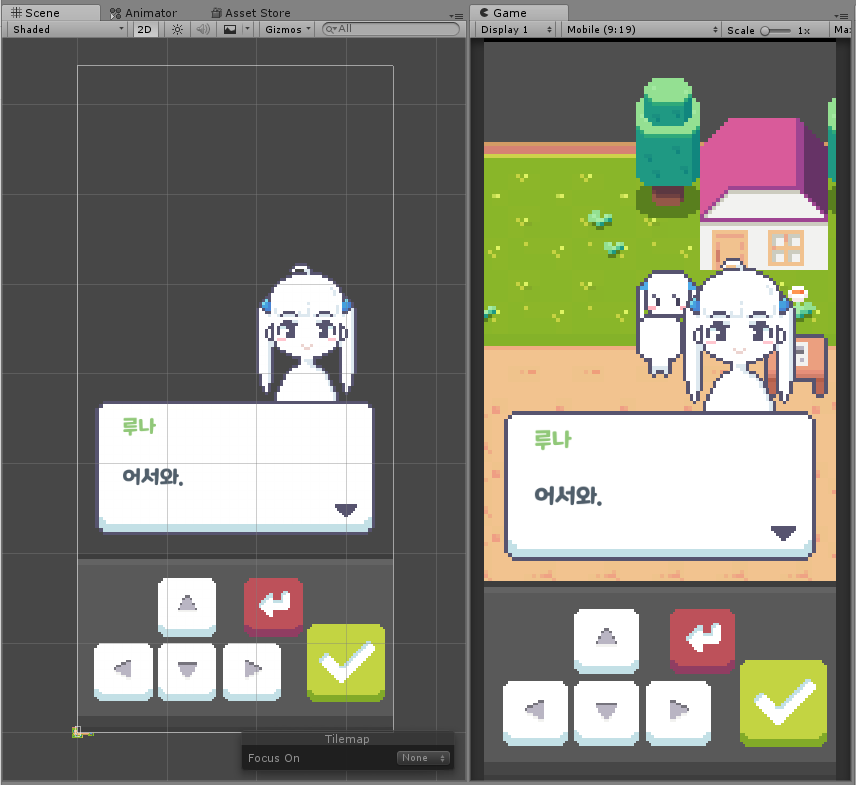
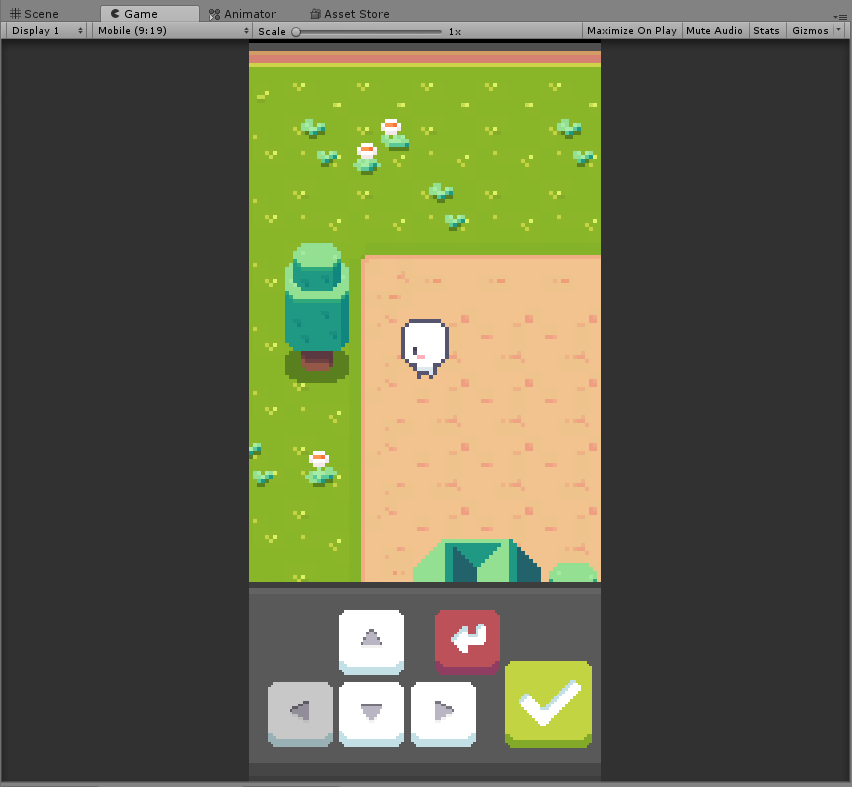
4. UI 크기
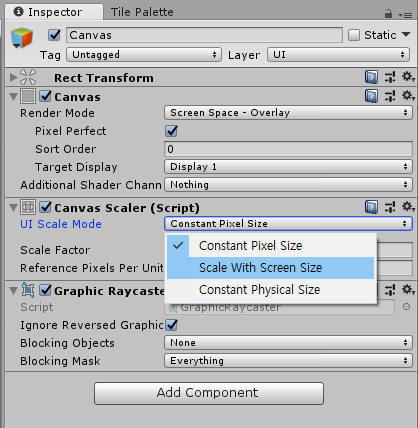
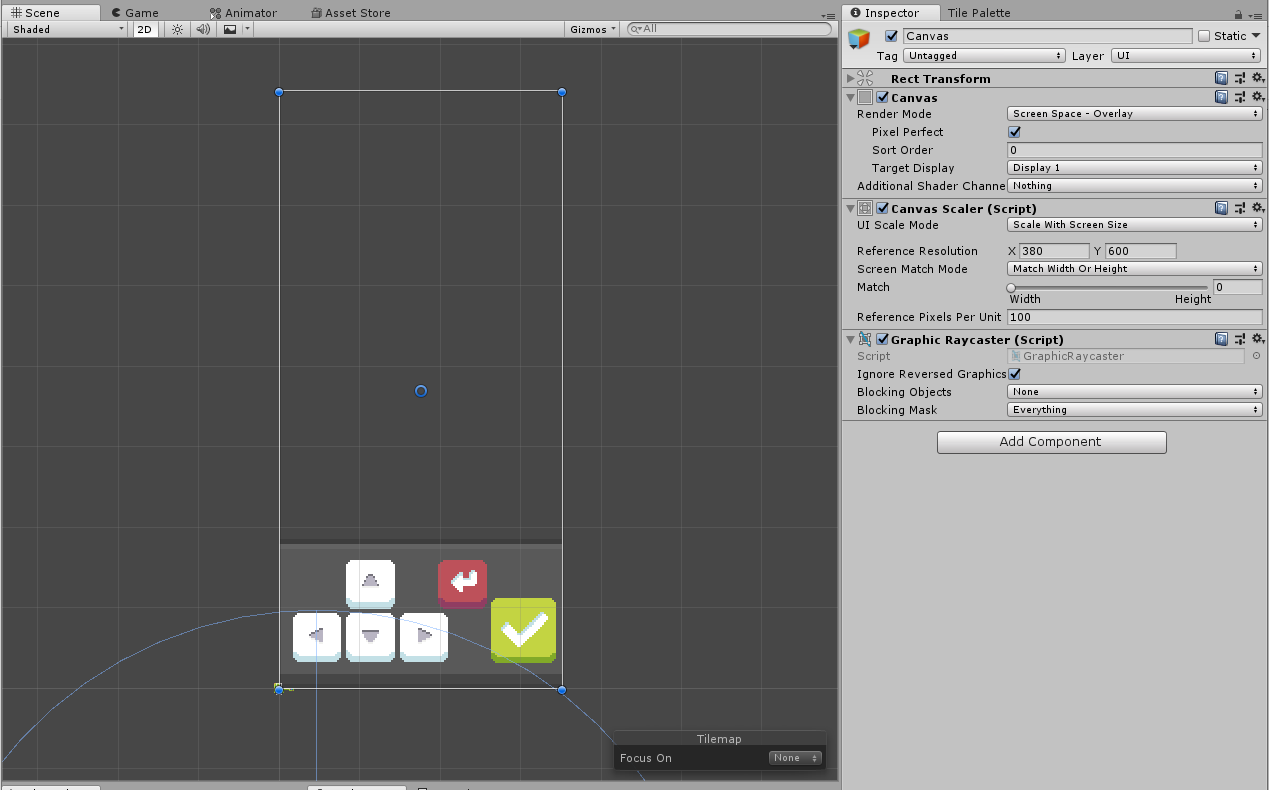
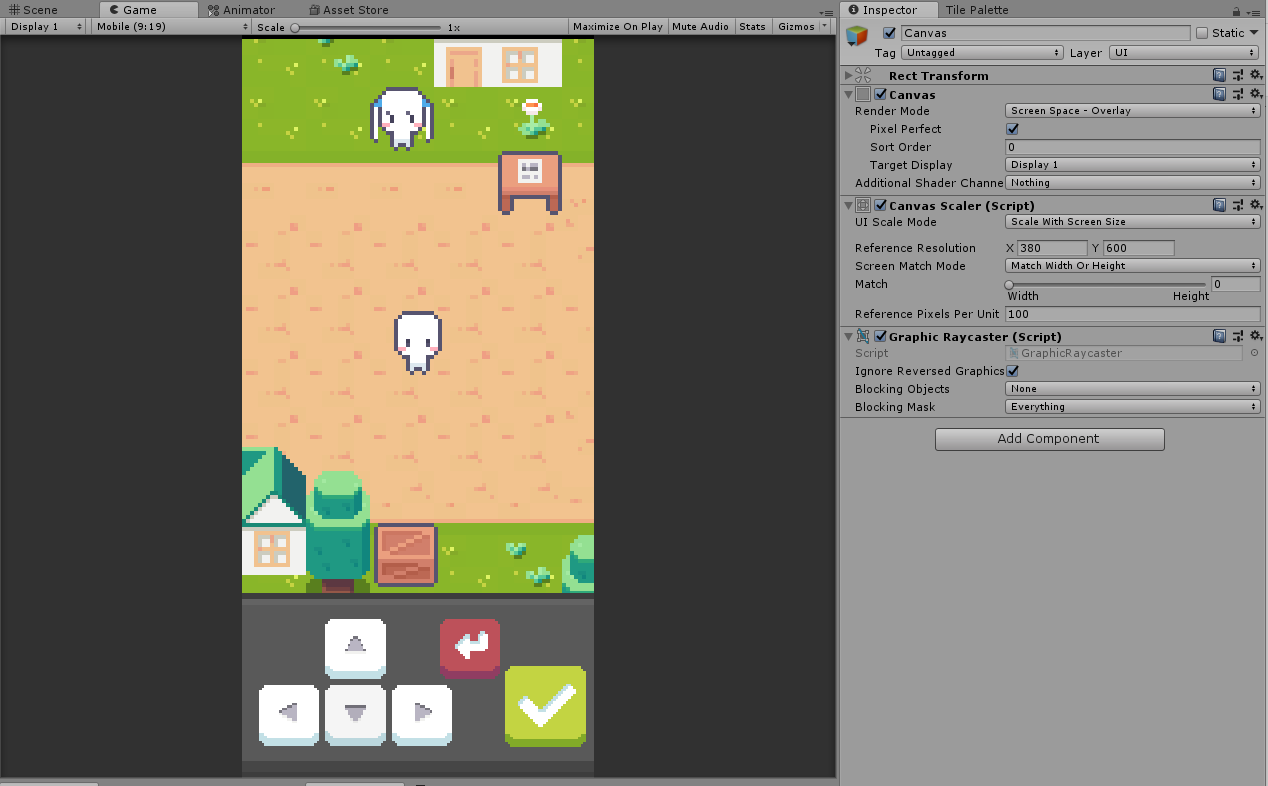
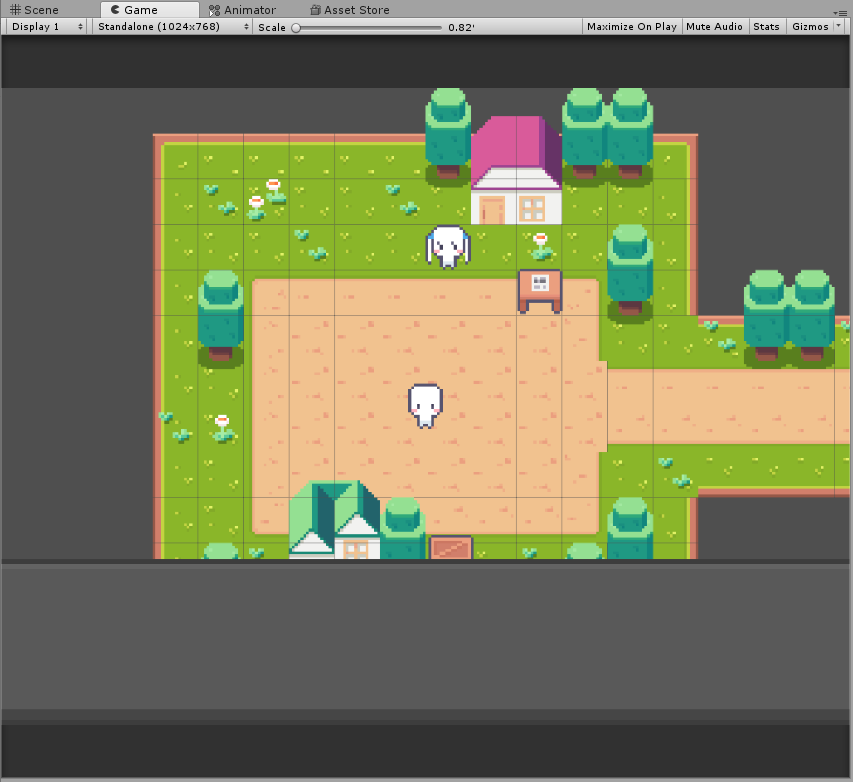
- 빌드하기 전에 휴대폰 해상도가 어떨지 모르므로 UI의 통상적인 기준을 잡아주기위해서 UI Scale Mode를 'Scale With Screen Size'로 변경하고 X축 값을 변경해서 UI 크기를 조절해준다
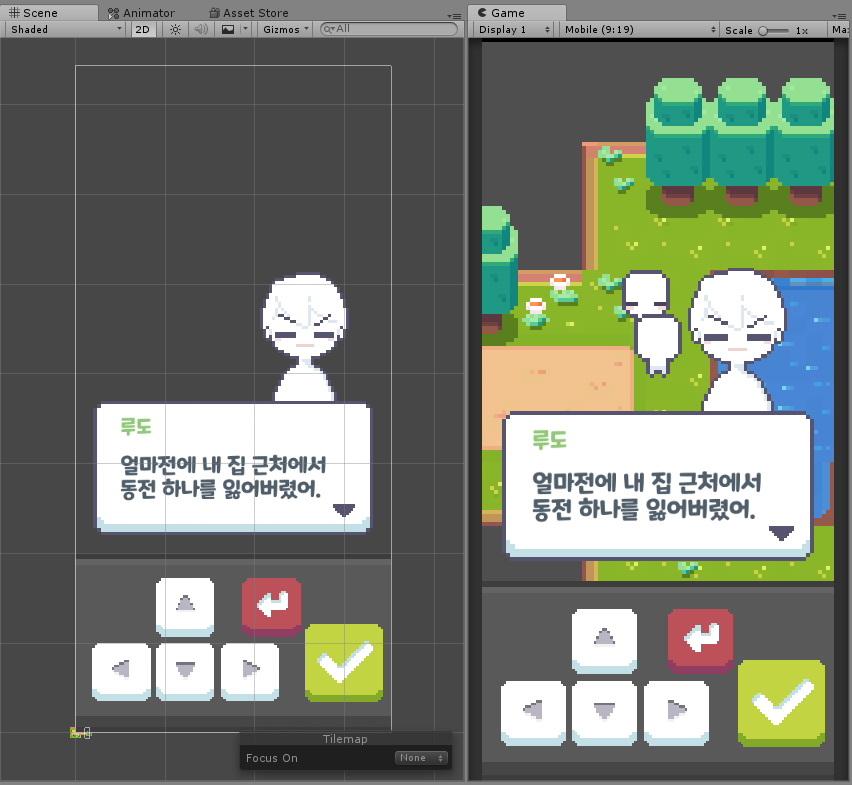
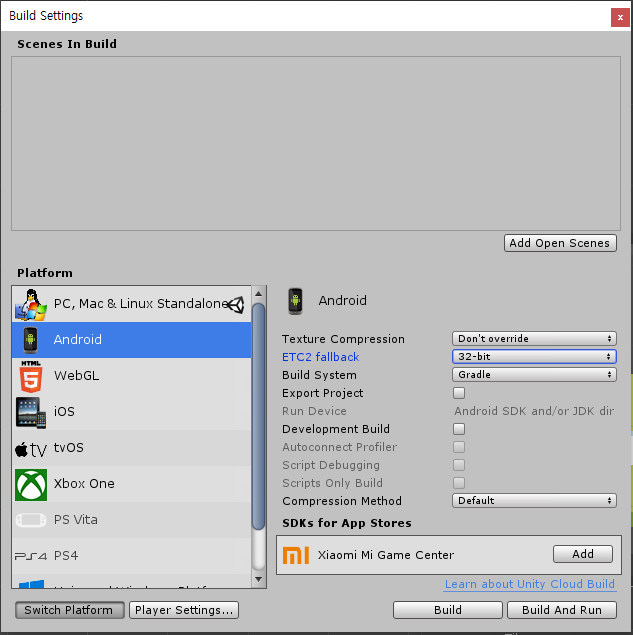
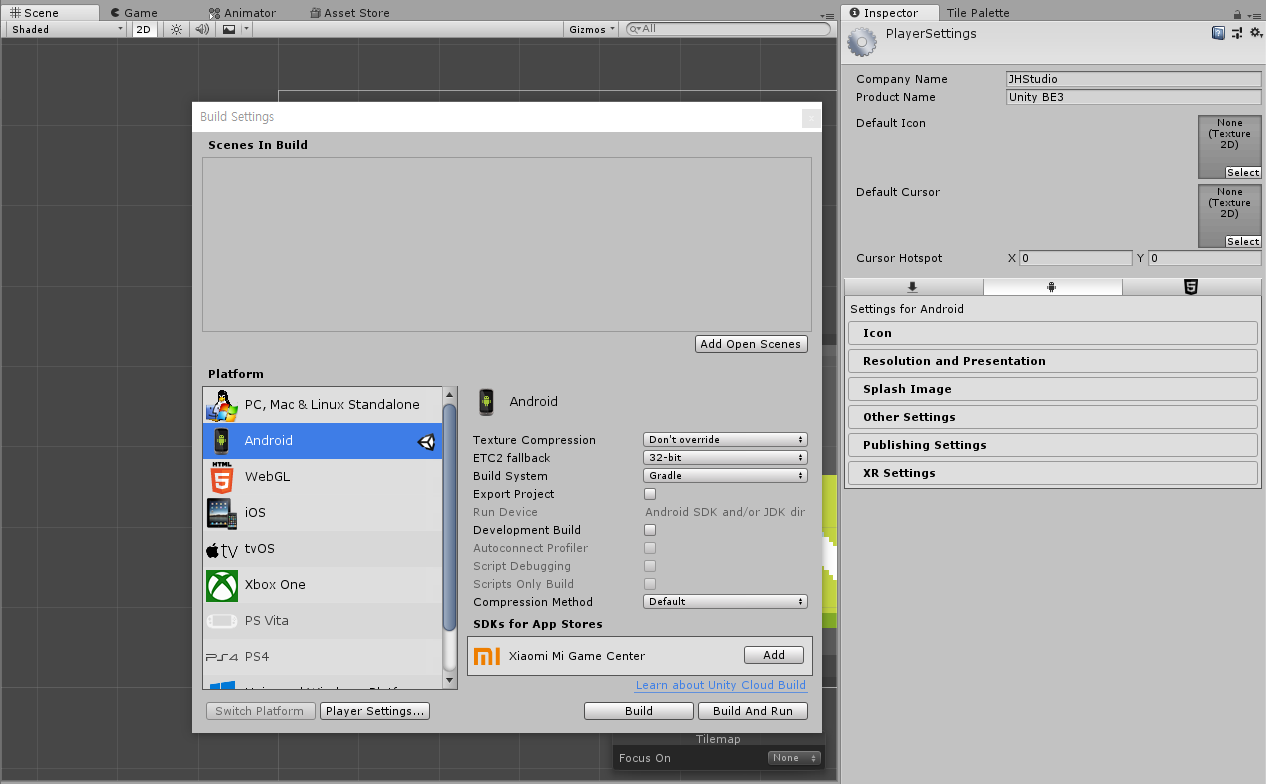
5. 모바일 빌드
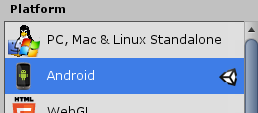
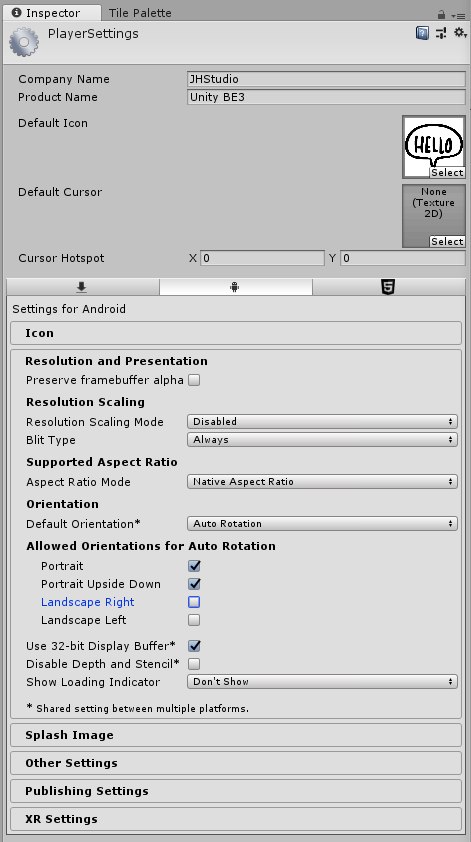
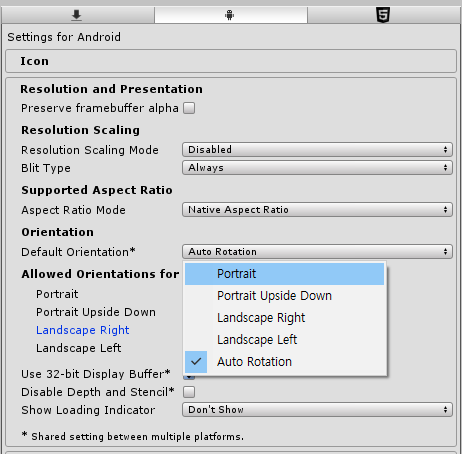
- 이번 게임 프로젝트는 세로 모드만 지원하므로 세로 모드인 Portrait 항목은 유지하고, 가로 모드인 Landscape 항목들은 모두 체크 해제하도록 한다.
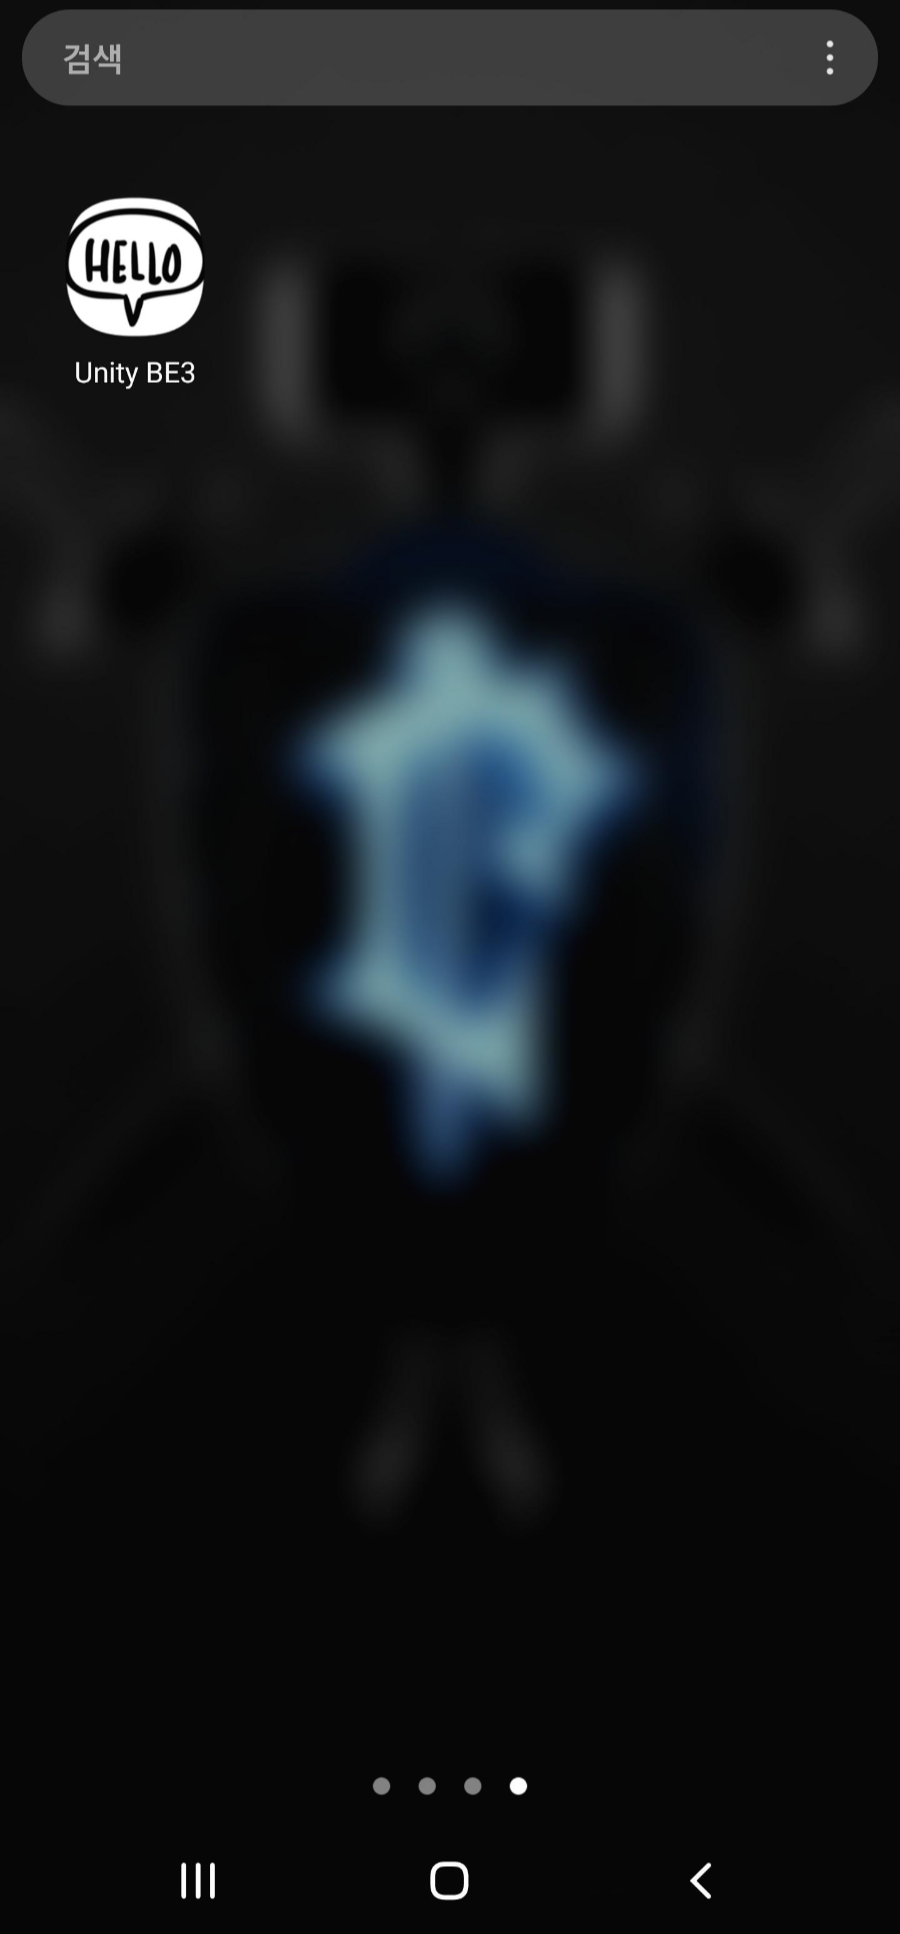
- 만약 유니티 퍼스널 라이센스, 즉 개인 라이센스라면 게임 실행시 유니티 로고가 뜬다. 그이상 라이센스여야만 유니티 로고를 제거할 수 있다.
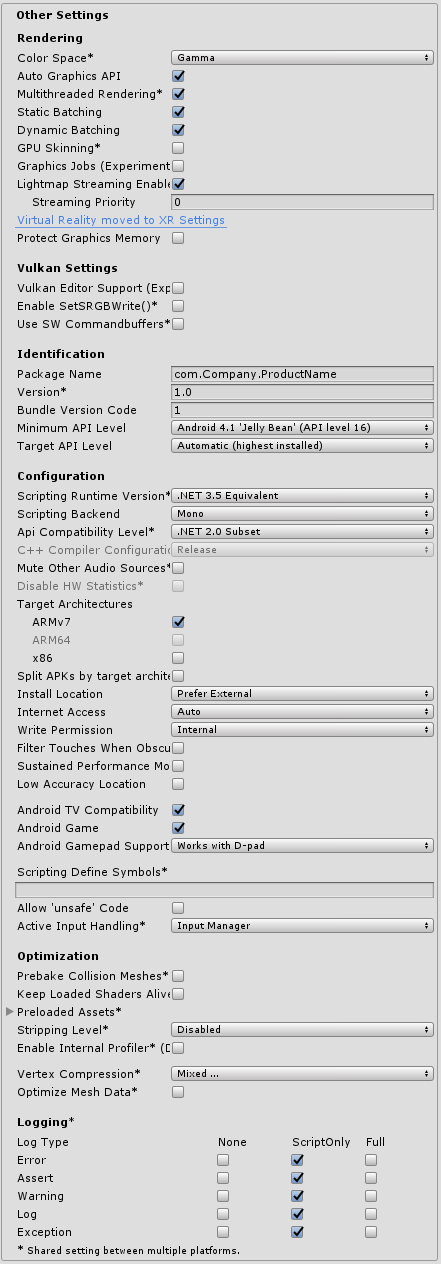
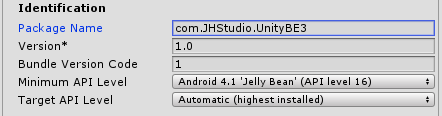

- Identification 항목에서 Package Name은 저번 시간에 만든 저장 버튼의 레지스트리의 경로를 지정했던 것처럼, 휴대폰에 저장하는 경로를 지정한다. 아래 Version과 Bundle Version Code는 구글 Play 스토어 같은 어플리케이션 스토어에서 업데이트 표시하는 용도로 사용한다.
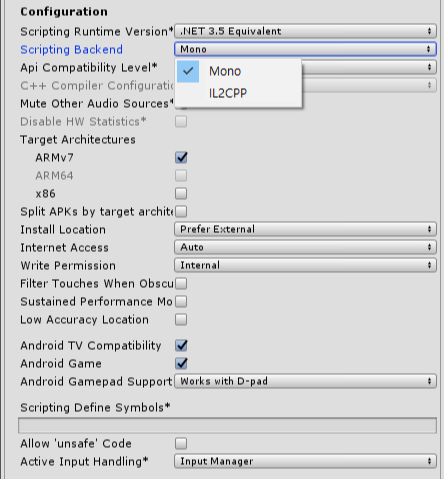
- Configuration 항목에서 Scripting Backend를 Mono에서 IL2CPP로 변경한 이유는, 구글 Play 스토어에서 2019년 8월 이후부터 32비트 어플리케이션에 제한을 걸었기때문이다. 따라서 64비트 APK 빌드를 위해 IL2CPP로 변경해야한다. 변경하게 되면 Target Architectures의 ARM 64가 활성화 되므로 이를 체크하고, 만약 x86이 체크되어 있다면 이는 32비트이므로 체크 해제 해야한다.
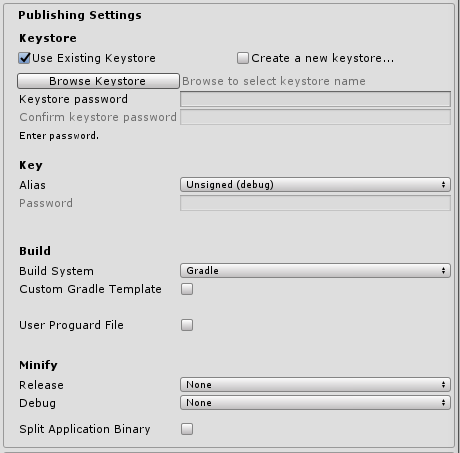
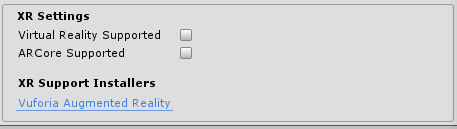
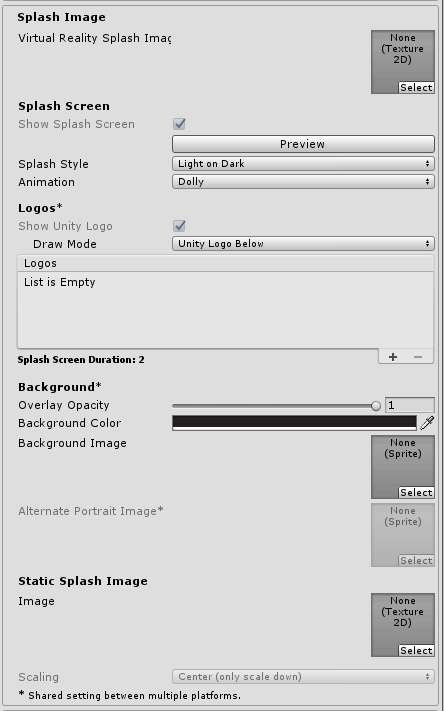
- 이 두 항목은 따로 변경 없이 넘어간다. 아마 Publishing Settings는 키 세팅과 관련 있는 것으로 보이고, XR Settings는 VR을 다루는 것 같다. 아무튼 이제 빌드를 하면된다
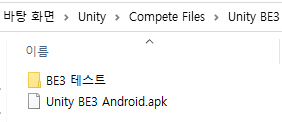
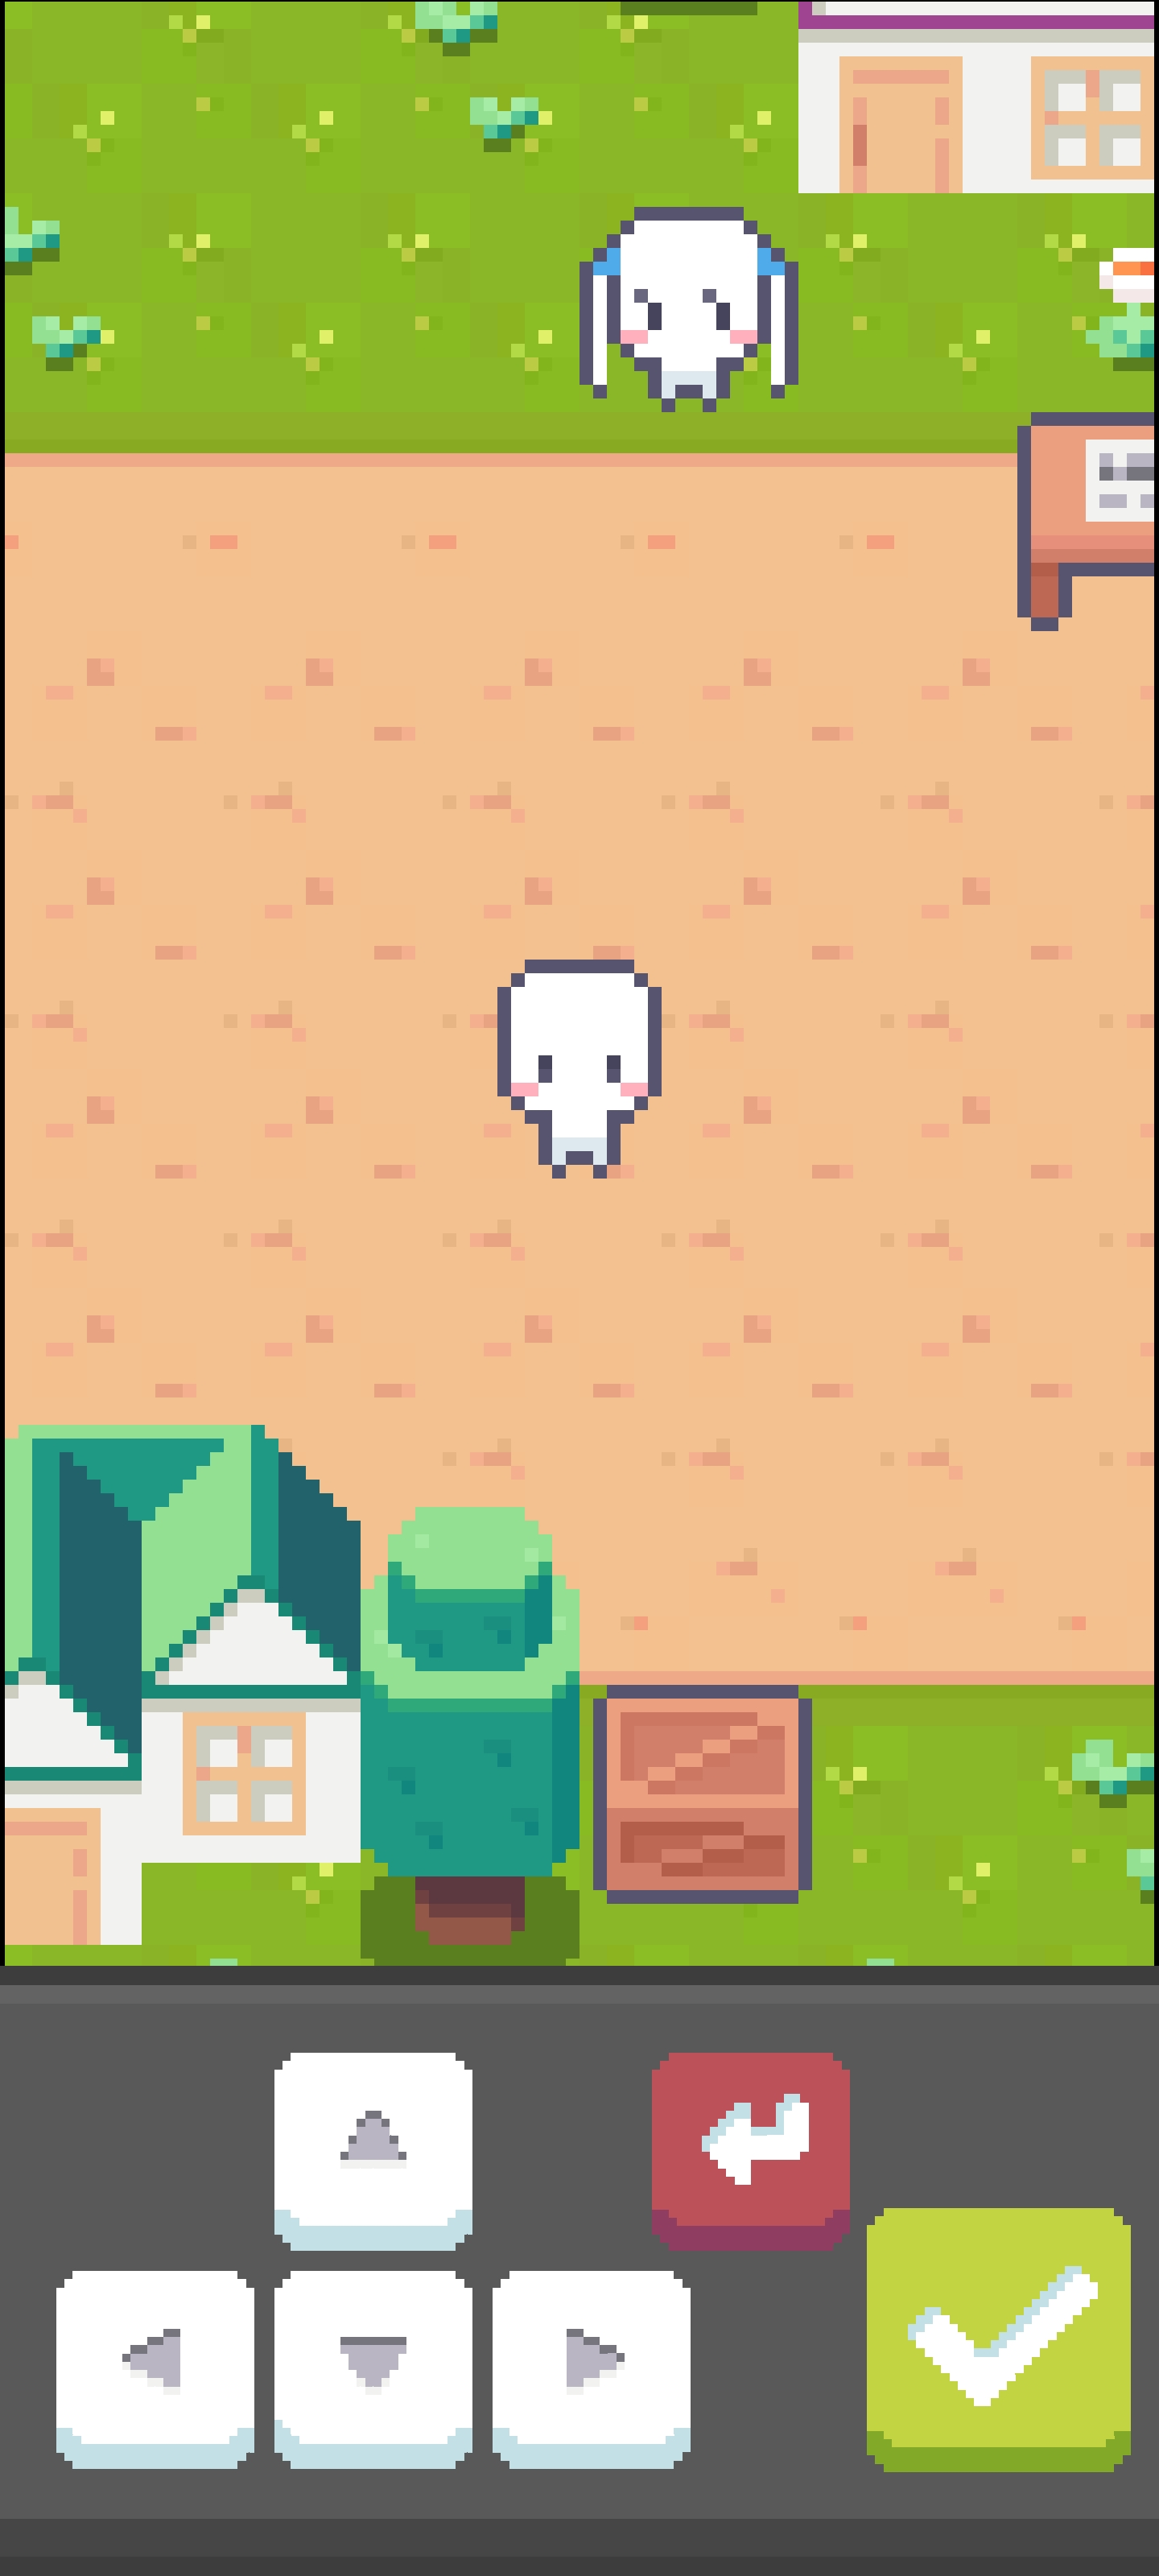
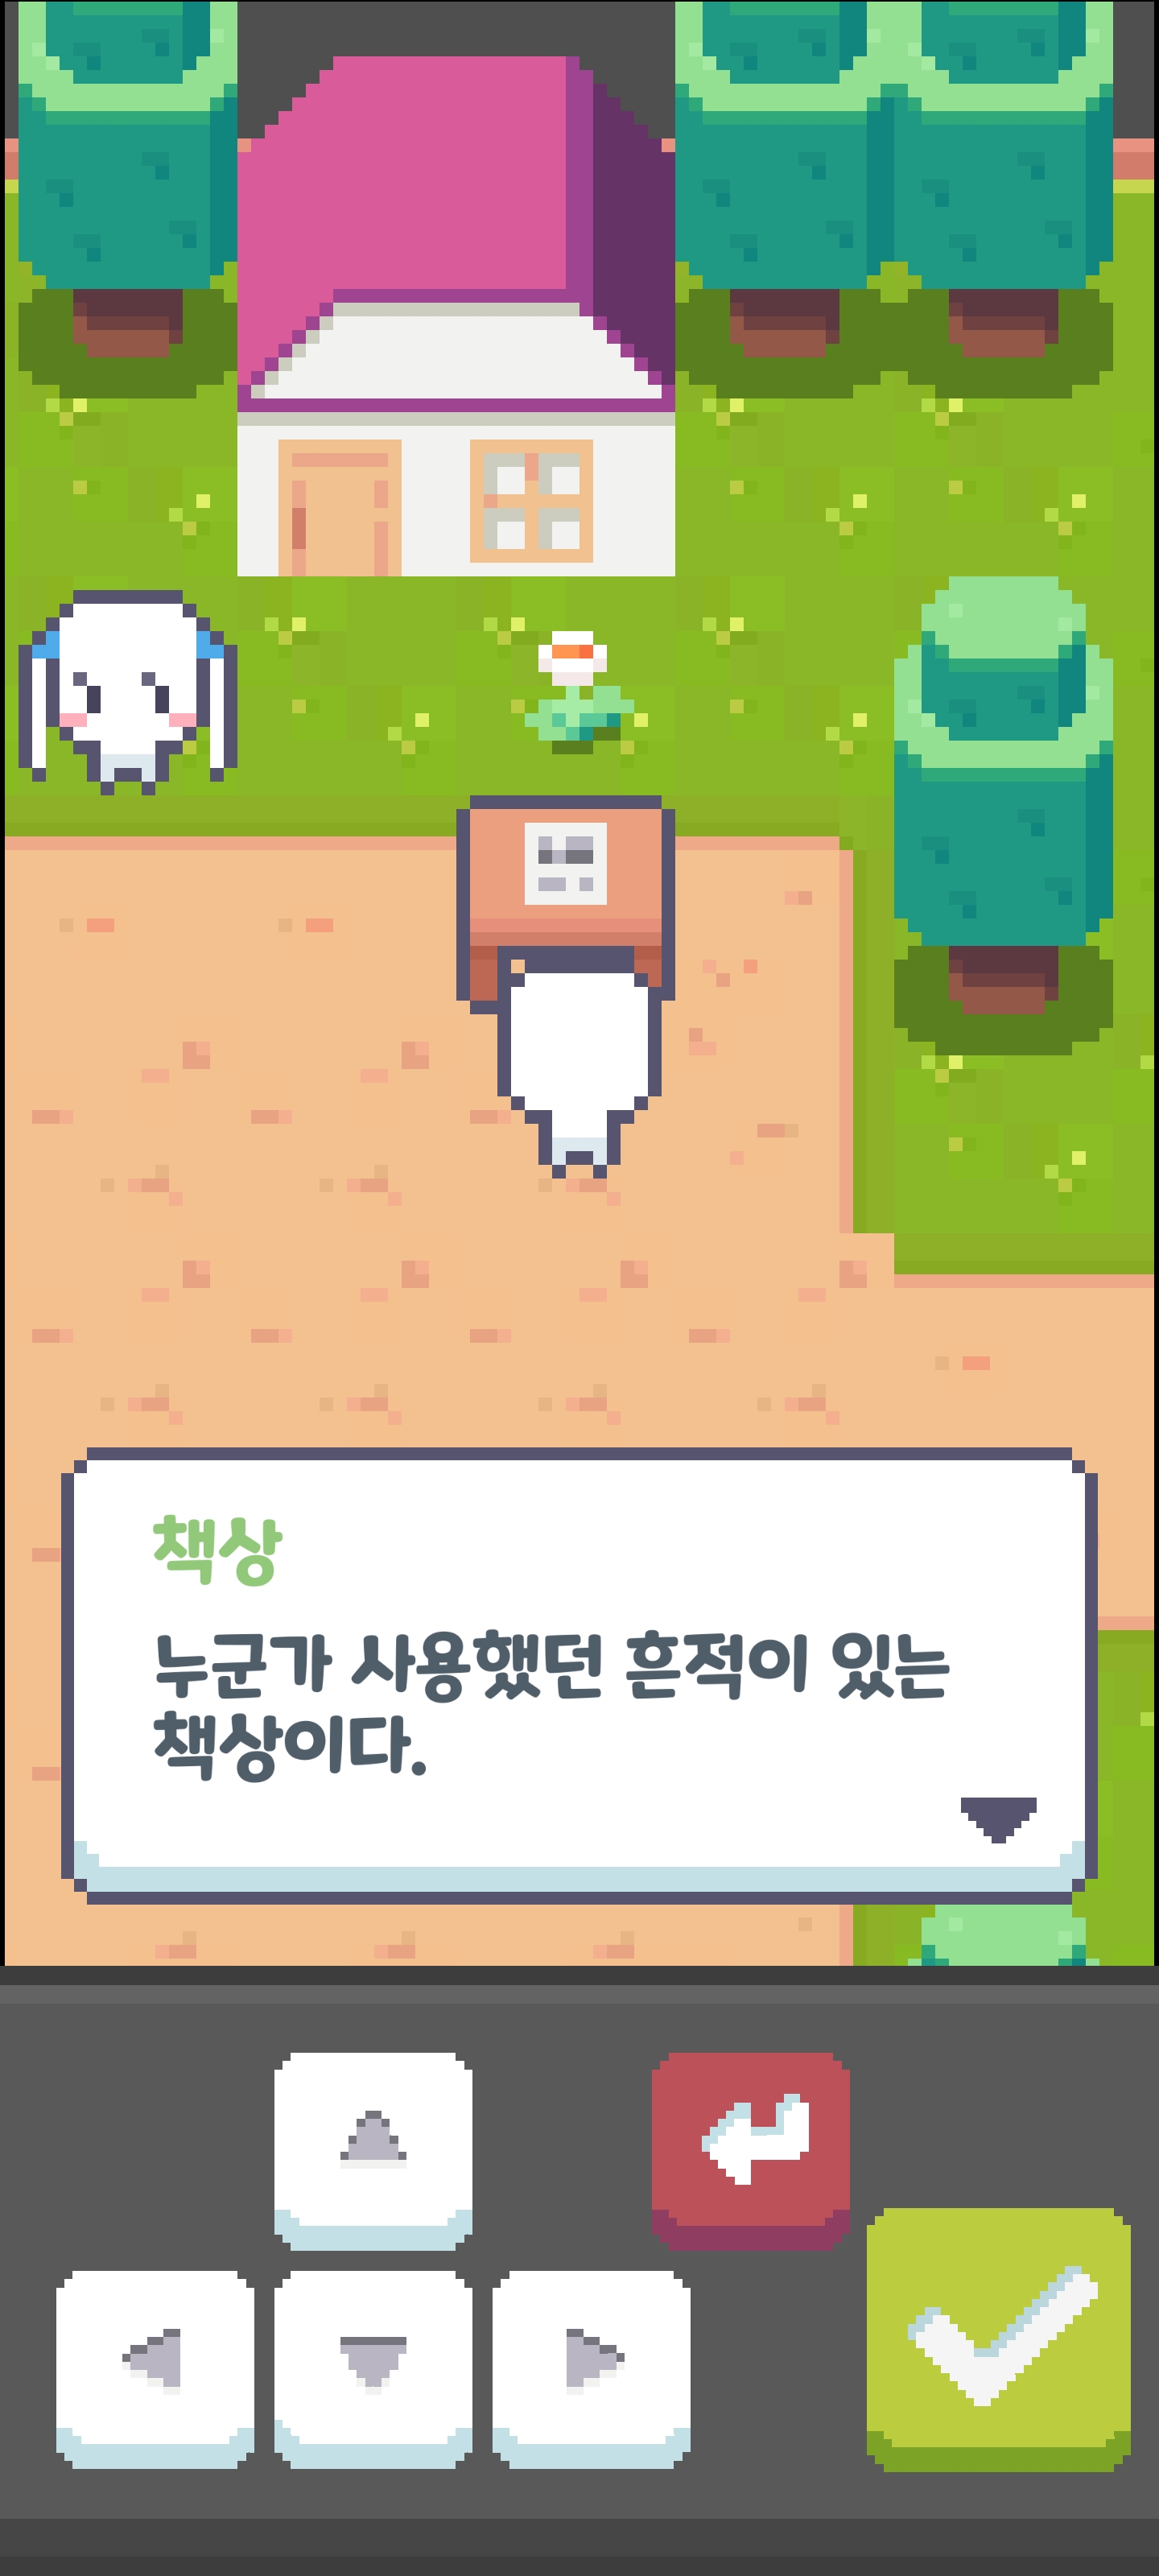
- 빌드 후 나온 이 apk 파일을 휴대폰으로 옮겨서 실행하면 끝이다.

- 참고로 이번 프로젝트를 빌드하면서 계속 JDK, SDK 문제가 발생해서 원인을 찾아보니 JDK 같은 프로그램 문제보다는 유니티 프로젝트가 저장되어있는 user 폴더 이름이 한글이어서 발생하는 문제였다. 이 문제를 알아내고 고치는게 이번 프로젝트 글 작성보다 더 오래걸린 것 같다..
- user 폴더의 이름 문제는 이 블로그 글을 통해서 해결했다.
'유니티 프로젝트 > 탑다운 2D RPG' 카테고리의 다른 글
| [Unity/유니티] 기초-탑다운 2D RPG: 서브메뉴와 저장기능 만들기[B26] (0) | 2022.02.22 |
|---|---|
| [Unity/유니티] 기초-탑다운 2D RPG: 대화 애니메이션 느낌있게 만들기[B25] (0) | 2022.02.21 |
| [Unity/유니티] 기초-탑다운 2D RPG: 퀘스트 시스템 구현하기[B24] (0) | 2022.02.20 |
| [Unity/유니티] 기초-탑다운 2D RPG: 대화 시스템 구현하기[B23] (0) | 2022.02.19 |
| [Unity/유니티] 기초-탑다운 2D RPG: 대화창 UI 구축하기[B22] (0) | 2022.02.18 |


